 Kawasaki Z1000SX - Service manual > ABS Servicing Precautions, ABS Troubleshooting Outline
ABS Servicing Precautions
There are a number of important precautions that should be followed servicing the ABS system.
- This ABS system is designed to be used with a 12 V sealed battery as its power source. Do not use any other battery except for a 12 V sealed battery as a power source.
- Do not reverse the battery cable connections. This will damage the ABS hydraulic unit.
- To prevent damage to the ABS parts, do not disconnect the battery cables or any other electrical connections when the ignition switch is ON or while the engine is running.
- Take care not to short the leads that are directly connected to the battery positive (+) terminal to the chassis ground.
- Do not turn the ignition switch ON while any of the ABS electrical connectors are disconnected. The ABS hydraulic unit memorizes service codes.
- Do not spray water on the electrical parts, ABS parts, connectors, leads and wiring.
- If a transceiver is installed on the motorcycle, make sure that the operation of the ABS system is not influenced by electric wave radiated from the antenna. Locate the antenna as far as possible away from the ABS hydraulic unit.
- Whenever the ABS electrical connections are to be disconnected, first turn off the ignition switch.
- The ABS parts should never be struck sharply, as with a hammer, or allowed to fall on a hard surface. Such a shock to the parts can damage them.
- The ABS parts cannot be disassembled. Even if a fault is found, do not try to disassemble and repair the ABS parts, replace it.
- The ABS has many brake lines, pipes, and leads. And the ABS cannot detect problems with the conventional braking system (brake disc wear, unevenly worn brake pad, and other mechanical faults). To prevent trouble, check the brake lines and pipes for correct routing and connection, the wiring for correct routing, and the brakes for proper braking power. Be sure to check for fluid leakage, and bleed the brake line thoroughly.
WARNING Air in the brake lines diminish braking performance and can cause an accident resulting in injury or death. If any of the brake line fittings, including the ABS hydraulic unit joint nuts, or the bleed valve is opened at any time, the air must be bled completely from the brake line. If the brake lever has a soft or "spongy" feeling mushy when it is applied, there might be air in the brake lines or the brake may be defective. Do not operate the vehicle and service the brake system immediately.
NOTICE Do not ride the motorcycle with air in the brake line, or the ABS could malfunction.
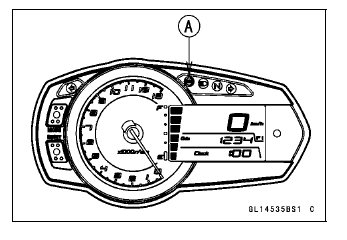
- The ABS indicator light (LED) [A] may light if the tire pressure is incorrect, a non-recommended tire is installed, or the wheel is deformed. If the indicator light lights, remedy the problem and clear the service code.
WARNING Use of non-recommended tires may cause malfunctioning of ABS and can lead to extended braking distance resulting in an accident causing serious injury or death. Always use recommended standard tires for this motorcycle.
- The ABS indicator light (LED) may come on if the engine is run with the motorcycle on its stand and the transmission in gear. If the indicator light comes on, just turn the ignition switch OFF, then clear service code 42, which indicates a "Faulty front wheel rotation sensor".
- When the ABS operates, the ABS makes noise and the rider feels the reaction force on the brake lever and brake pedal. This is a normal condition. It informs the rider that the ABS is operating normally.
- Service codes detected once by the ABS hydraulic unit will be memorized in the ABS hydraulic unit. Therefore, after maintenance work is finished, be sure to erase the service codes. Do not erase the service codes during troubleshooting. Wait until all the checks and repair work are finished to prevent duplication of previous service codes and unnecessary maintenance work.
- Before delivering the motorcycle to the customer, be sure to erase any service codes which might be stored in the ABS hydraulic unit. Using the self-diagnosis feature, make sure that the ABS indicator light (LED) lights. A fully charged battery is a must for conducting reliable self-diagnosis. Test run the motorcycle at a speed of more than 20 km/h (12 mph) to see that the ABS indicator light (LED) does not come on. Finally, test run the motorcycle at a speed of more than 30 km/h (20 mph) and brake suddenly to see that the motorcycle stops without loss of steering control and the ABS operates normally (The reaction force generated is felt in the brake lever and pedal.). This completes the final inspection.
ABS Troubleshooting Outline
When an abnormality in the system occurs, the ABS indicator light (LED) lights up to alert the rider. In addition, the nature of the fault is stored in the memory of the ABS hydraulic unit and when in the self-diagnosis mode, the service code [A] is indicated by the number of times the ABS indicator light (LED) blinks. The service codes stored in memory are not erased until the mode has been changed to the fault erase mode after the fault has been corrected.
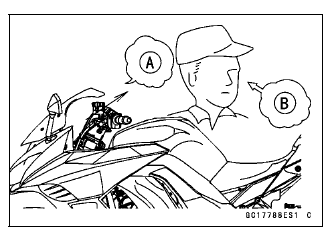
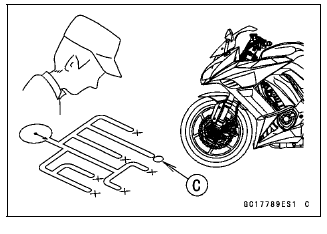
Therefore, after correcting the problem, always erase the service codes and then run the self-diagnosis program to confirm normal signal output. When, due to a malfunction, the ABS indicator light (LED) remains lit, get a thorough understanding of the background before starting the repair work. Ask the rider about the conditions [B] under which the problem occurred and try to determine the cause [C].
Do not rely solely on the ABS self-diagnosis function, use common sense; check the brakes for proper braking power, and brake fluid level, search for leaks, etc.
Even when the ABS is operating normally, the ABS indicator light (LED) may light up under the conditions listed below.
Turn the ignition switch OFF to stop the indicator light.
If the motorcycle runs without erasing the service code, the light may light up again.
- After continuous riding on a rough road.
- When the engine is started with the stand raised and the transmission engaged, and the rear wheel turns.
- When accelerating so abruptly that the front wheel leaves the ground.
- When the ABS has been subjected to strong electrical interference.
- When tire pressure is abnormal. Adjust tire pressure.
- When a tire different in size from the standard size is being used. Replace with standard size.
- When the wheel is deformed. Replace the wheel.
Much of the ABS troubleshooting work consists of confirming continuity of the wiring. The ABS parts are assembled and adjusted by the manufacturer, so there is no need to disassemble or repair them. Replace the ABS hydraulic unit.
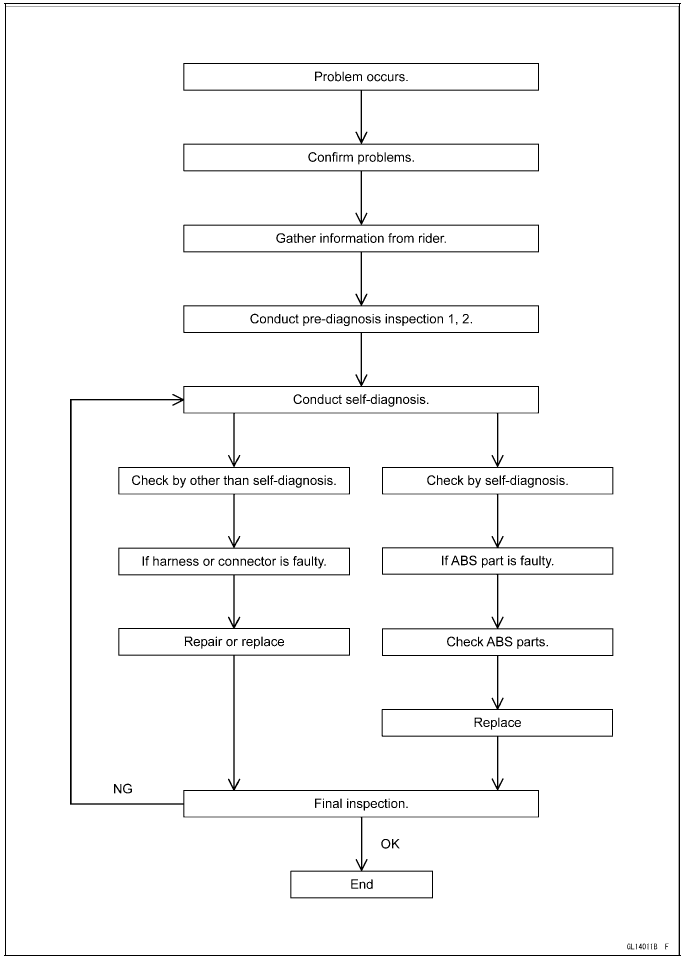
The basic troubleshooting procedures are listed below.
- Carry out pre-diagnosis inspections as a preliminary inspection.
- Determine the fault using the self-diagnosis function.
- Check wiring and connections from the ABS hydraulic unit connector to
the suspected faulty ABS part, using the hand tester.
Special Tool - Hand Tester: 57001-1394
- Visually inspect the wiring for signs of burning or fraying.
If any wiring is poor, replace the damaged wiring.
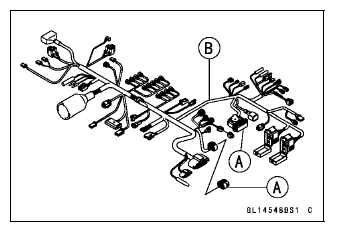
- Pull each connector [A] apart and inspect it for corrosion, dirt and
damage.
If the connector is corroded or dirty, clean it carefully. If it is damaged, replace it.
- Check the wiring for continuity.
- Use the wiring diagram to find the ends of the lead which is suspected of being a problem.
- Connect the hand tester between the ends of the leads.
Special Tool - Hand Tester: 57001-1394
- Set the tester to the × 1 Ω range, and read the tester.
If the tester does not read 0 Ω, the lead is defective. Replace the main harness [B] if necessary.
- Narrow down suspicious parts and close in on the faulty ABS part by
repeating the continuity tests.
If no abnormality is found in the wiring or connectors, the ABS parts are the next likely suspects. Check each part one by one.
If an abnormality is found, replace the affected ABS part.
ABS Diagnosis Flow Chart
See also:
 Kawasaki Z1000SX - Service manual > Parts Location
Front Wheel Rotation Sensor [A] Front Wheel Rotation Sensor Rotor [B]
Kawasaki Z1000SX - Service manual > Inquiries to Rider
Each rider reacts to problems in different ways, so it is important to confirm what kind of condition the rider is dissatisfied with. Try to find out exactly what problem occurs under exactly what conditions by asking the rider; knowing this information may help you reproduce the problem in the shop. The diagnosis sheet will help prevent you from overlooking any keys, so always use it.
 Rider's Manual BMW R 1250 GS GSA
 Owner's Manual Harley-Davidson Sportster XL1200X Forty-Eight
 Owner's Manual Honda CBR650R
 Service manual Honda CBR650
 Owner's Manual Honda PCX125
 Owner's Manual Kawasaki Z1000SX
 Service manual Kawasaki Z1000SX
 Owner's Manual Lexmoto Echo
 Owner's Manual Royal Enfield Interceptor 650
 Service manual Royal Enfield Interceptor 650
 Owner's Manual Yamaha MT-07