 Kawasaki Z1000SX - Service manual > Fenders
Frame / Fenders
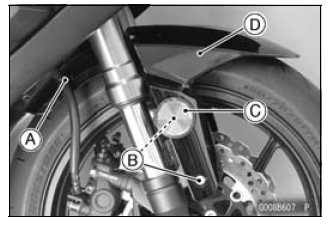
Front Fender Removal
- Remove:
Brake Hose Clamps [A] (Both Sides)
Bolts [B] with Washers (Both Sides)
Reflectors [C] (Both Sides, US, CA and CAL Models)
Front Fender [D]
Front Fender Installation
- Installation is the reverse of removal, note the following.
- Install the front fender to the front fork.
- Tighten:
Torque - Front Fender Mounting Bolts: 3.9 N*m (0.40 kgf*m, 35 in*lb) - Replace the brake hose clamps with new ones (ZX1000GB/HB Early Models
- Install the brake hose clamps to the front fender holes.
- For ZX1000GB/HB Late Models -, face the lock portion [A] of the brake hose clamp backward.

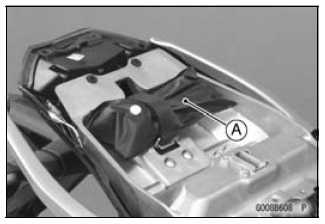
Flap and Rear Fender Removal
- Remove:
Seats (see Front/Rear Seat Removal)
Seat Cover (see Seat Cover Removal)
Owner's Tool [A]
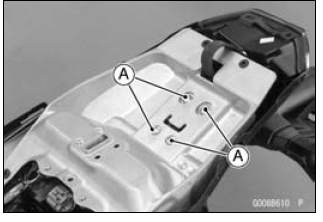
- Remove:
Bolts [A]
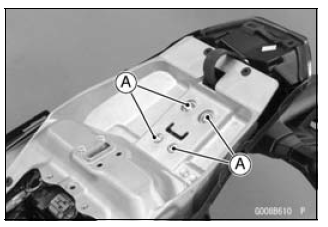
- Remove:
Bolts [A]
- Push the rear fender [A] downward.
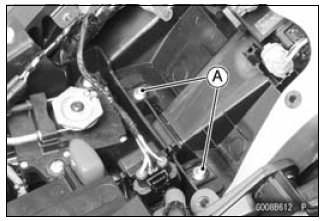
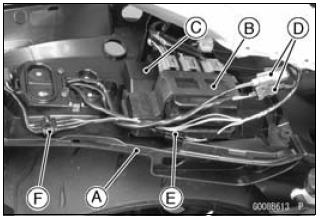
- Remove:
Relay Box [B]
ECU [C] - Disconnect:
Turn Signal Light Lead Connectors [D]
Licence Plate Light Lead Connector [E]
Tali Light Lead Connector [F] - Remove the rear fender rearward.
Flap and Rear Fender Installation
- Installation is the reverse of removal, note the following.
- Replace the rear fender mounting bolts [A] with new ones.
- Run the cables, leads, harness and hose correctly (see Cable, Wire, and Hose Routing section in the Appendix chapter).
- Tighten: Torque - Grab Rail Mounting Bolts: 25 N*m (2.5 kgf*m, 18 ft*lb)
See also:
 Kawasaki Z1000SX - Service manual > Side/Seat Covers
Side Covers Side Cover Removal Remove: Lower Fairing (see Lower Fairing Removal) Bolts [A] with Washers Pull the side cover [B] outward to clear the stoppers [C].
Kawasaki Z1000SX - Service manual > Frame
Frame Inspection Visually inspect the frame for cracks, dents, bending, or warp. If there is any damage to the frame, replace it.
 Rider's Manual BMW R 1250 GS GSA
 Owner's Manual Harley-Davidson Sportster XL1200X Forty-Eight
 Owner's Manual Honda CBR650R
 Service manual Honda CBR650
 Owner's Manual Honda PCX125
 Owner's Manual Kawasaki Z1000SX
 Service manual Kawasaki Z1000SX
 Owner's Manual Lexmoto Echo
 Owner's Manual Royal Enfield Interceptor 650
 Service manual Royal Enfield Interceptor 650
 Owner's Manual Yamaha MT-07