 Kawasaki Z1000SX - Owner's Manual > Side Stand
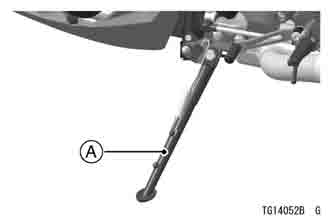
The motorcycle is equipped with a side stand.
- Side Stand
NOTE
- When using the side stand, turn the handlebar to the left.
Do not sit on the motorcycle while it is on its side stand. Always kick the stand fully up before sitting on the motorcycle.
NOTE
- The motorcycle is equipped with a side stand switch. This switch is designed so that the engine does not start if the transmission is in gear and the side stand is down.
Seats
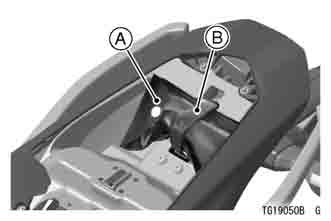
Passenger's Seat Removal
- Remove the passenger's seat by inserting the ignition key into the seat lock, and turning it clockwise.
WARNING The muffler quickly becomes very hot soon after the engine is started and can cause serious burns. To avoid burns, be careful not to touch the muffler when operating the seat lock.
- Seat Lock
- Ignition Key
NOTE
- When removing the passenger's seat, pull it up while turning the key.
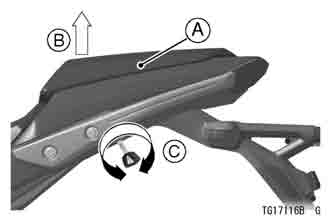
- Passenger's Seat
- Pull up
- Turn the Key
Rider's Seat Removal
- Remove the bolts and pull off the seat upward
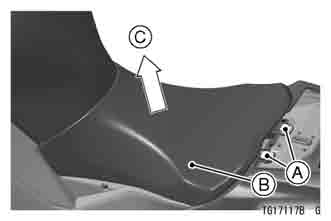
- Bolts
- Rider's Seat
- Pull up
Rider's Seat Installation
- Insert the tabs on the front of the rider's seat into the slots in the frame.
- Rider's Seat
- Tabs
- Slots
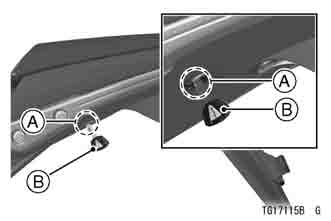
Passenger's Seat Installation
- Insert the tab on the rear of the passenger's seat into the slot in the frame.
- Insert the projection at the front of the passenger's seat into the hole on the frame.
- Push down the front part of the passenger's seat until the lock clicks.
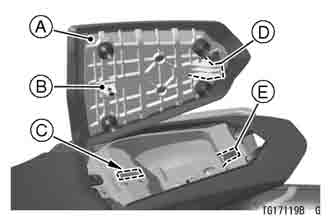
- Passenger's Seat
- Projection
- Hole
- Tab
- Slot
- Pull up the front and rear ends of the passenger's and rider's seats to make sure they are securely locked.
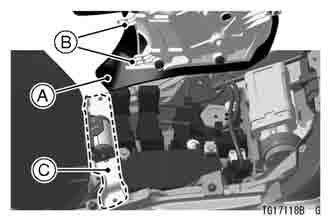
Tool Kit
The tool kit is located under the passenger's seat.
The kit contains tools that are helpful in making roadside repairs, adjustments, and some maintenance procedures explained in this manual. Keep the tool kit in the original place.
- Tool Kit
- Band
Windshield
The windshield can be adjusted within 3 positions in height to suit the rider's preference.
Adjustment
- Hold the windshield by the hand.
- Adjust the windshield mounting positions while pushing the knob located the lower side of the meter cover.
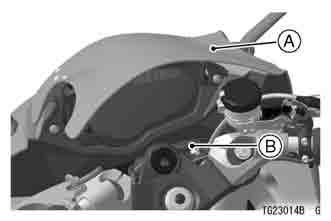
- Windshield
- Knob
- Align the mark of the meter cover and the groove of the windshield bracket.
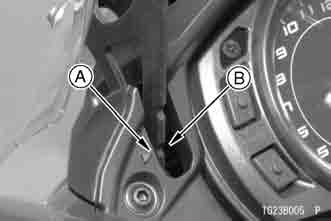
- Mark
- Groove
- Separate the hand from the windshield and return the knob to the original position.
- Be sure the windshield is fixed securely.
WARNING Removing your hand(s) from the handlebars while riding could lead to a crash resulting in serious injury or death. Do not adjust the angle of the windshield while riding; stop the motorcycle before making any adjustments. Turning the handlebars while using the knob to adjust the windscreen may pinch your hand and/or fingers between the knob and front fork. Do not turn the handlebars while adjusting the windshield angle. Failure to lock the windshield angle after adjustment may cause the angle of the screen to unexpectedly change while riding, causing a distraction for the rider that could lead to a crash resulting in serious injury or death.
Firmly lock the knob after adjusting the windshield.
Break-in
The first 1 600 km (1 000 miles) that the motorcycle is ridden is designated as the break-in period. If the motorcycle is not used carefully during this period, you may very well end up with a "broken down" instead of a "broken in" motorcycle after a few thousand kilometers.
The following rules should be observed during the break-in period.
- The table shows maximum recommended engine speed during the break-in period.

NOTE
- When operating on public roadways, keep maximum speed under traffic law limits.
- Do not start moving or race the engine immediately after starting it, even if the engine is already warm. Run the engine for two or three minutes at idle speed to give the oil a chance to work up into all the engine parts.
- Do not race the engine while the transmission is in neutral.
WARNING New tires are slippery and may cause loss of control and injury.
A break-in period of 160 km (100 miles) is necessary to establish normal tire traction. During break-in, avoid sudden and maximum braking and acceleration, and hard cornering.
In addition to the above, at 1 000 km (600 miles) it is extremely important that the owner has the initial maintenance service performed by an authorized Kawasaki dealer.
See also:
 Kawasaki Z1000SX - Owner's Manual > Fuel
Fuel Tank Cap To open the fuel tank cap, pull up the key hole cover. Insert the ignition key into the fuel tank cap and turn the key to the right. To close the cap, push it down into place with the key inserted. The key can be removed by turning it to the left to the original position. Close the key hole cover.
 Rider's Manual BMW R 1250 GS GSA
 Owner's Manual Harley-Davidson Sportster XL1200X Forty-Eight
 Owner's Manual Honda CBR650R
 Service manual Honda CBR650
 Owner's Manual Honda PCX125
 Owner's Manual Kawasaki Z1000SX
 Service manual Kawasaki Z1000SX
 Owner's Manual Lexmoto Echo
 Owner's Manual Royal Enfield Interceptor 650
 Service manual Royal Enfield Interceptor 650
 Owner's Manual Yamaha MT-07