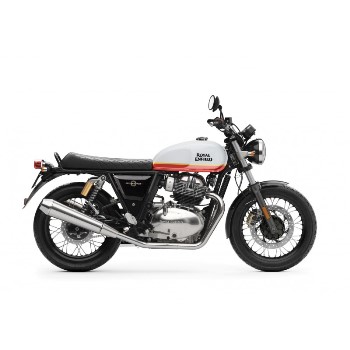
 Royal Enfield Interceptor 650 - Owner's Manual > Spark plug
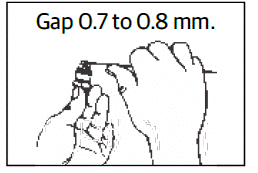
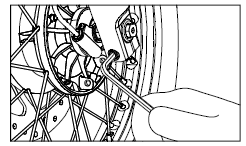
CLEANING SPARK PLUG AND ADJUSTING GAP
- Disconnect spark plug caps from the spark plugs.
- Locate spark plug spanner on the spark plug, loosen spark plug and remove it from cylinder head.
- Check spark plug for carbon deposits and centre electrodes for uneven wear.
- Clean spark plug by positioning it in a spark plug cleaning machine.
- Remove spark plug from the cleaning machine, check and set electrode gap between 0.7 to 0.8 mm.
- Position spark plug in the spark plug testing machine and check for proper functioning of the spark plug.
- Always replace spark plugs ONLY as per recommended specification.
- Apply a thin film of "anti seize" on the spark plug mounting and threads fix the spark plug by hand tightening.
- Tighten spark plug to torque 10 to 15 Nm by using a spark plug spanner.
BRAKE FLUID FRONT AND REAR
- Ensure motorcycle is upright on a firm at surface on its centre stand.
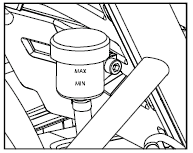
- Check brake fluid level in the window on front and rear reservoirs.
- The level is correct if the oil level is between the "MIN" and "MAX" marks.
- Open the reservoir cover and remove diaphragm carefully to top up the brake fluid.
- Top up only with DOT 4 brake fluid untill level is between "MIN" and "MAX" marks in the reservoir.
- Replace diaphragm correctly and close cover firmly.
- Wipe off any excess / spilled brake fluid immediately with a clean cloth.

Front Brake
Rear Brake
CAUTION
Brake fluid is highly corrosive and can cause damage to painted parts. Please ensure that brake fluid does not spill on any part of the motorcycle. In the event of a spill, please clean the area immediately with a soft wet cloth to avoid damage to the affected part.
DO NOT mix different brake fluid grades. Use ONLY DOT 4 Brake fluid.
INSPECTION OF TYRES AND WHEELS
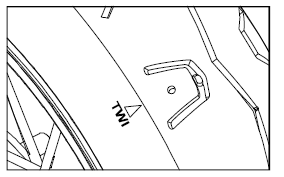
- Inspect the tyres periodically for tread wear, cracks and cuts.

- Check and remove stone, splinters, nails or other particles embedded in the tyre treads.
- Periodically inspect wheels for spokes damage and wheel rim for wobbling or run out.
- Check uniform seating of the tyre beading on the rim whenever the tyre is reassembled.
- Use only recommended tyres and tubes, inflated to correct air pressure as given below.

FRONT WHEEL REMOVAL
- Ensure motorcycle is upright on a firm and at surface.
- Place a wooden block on the front end of engine to support the motorcycle and ensure front wheel is off the ground by minimum 2 inches.
- From wiring harness RH side disconnect the speedo drive coupler.
- Loosen the pinch bolt on the front fork bottom right side.
- Remove the axle nut along with washer, hold the wheel axle on the right side and loosen hex nut on the left completely.
- Remove axle nut and washer from wheel axle.
- Tap and remove the front wheel spindle, gently tap axle from left side while supporting wheel at the bottom then remove axle from the right side.
CAUTION
Take care to secure the wheel spacers and speed sensor while removing the axle from the forks.
- Slide out the front wheel from the forks.
CAUTION
Do not press the brake lever when front wheel is removed as this will result in the brake pads coming too far out of the brake caliper.
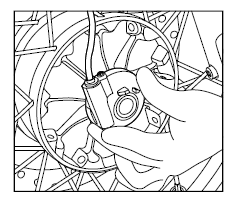
- Place a 4 mm thick wooden piece or cardboard sheet between the brake pads to avoid pads activation in the event the front brake lever is accidently pressed.
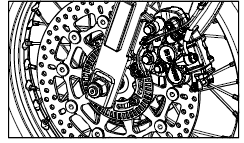
- Take care not to damage the front brake disc or tonering as it will affect the braking system and ABS.
See also:
 Royal Enfield Interceptor 650 - Owner's Manual > Hand levers, centre and side stand pivots
The following simple maintenance activities will help maintaining your motorcycle. However, for an complete maintenance, we recommend you to get in touch with a Royal Enfield Authorised Service Centre. Clean the pivot points and ensure they are free of any dirt, grime, rust, etc. Lubricate the pivots.
Royal Enfield Interceptor 650 - Owner's Manual > Front wheel reassembly
Remove the wooden piece / cardboard sheet placed between the brake pads. Locate speedo drive to its correct position on the right side. Locate stepped spacer to the wheel hub on left side. Insert the wheel along with speedo drive and spacer between the fork ends. Ensure the brake disc is located between the brake pads. Support front wheel at the bottom and ensure the mounting holes are aligned to insert the wheel axle along the right side fork end. Gently tap axle into wheel till the threaded portion of axle is fully visible on the left side fork end. Assemble washer and nut on axle. Hold the wheel axle firmly on right side and tighten axle nut firmly on right side to a torque of 70 Nm. Tighten pinch bolt completely on fork end to a torque of 25 Nm. Rotate wheel to check for smooth rotation. Connect the speedo wire coupler and check for proper working of speedometer. Press brake lever and check front brake efficiency.
 Rider's Manual BMW R 1250 GS GSA
 Owner's Manual Harley-Davidson Sportster XL1200X Forty-Eight
 Owner's Manual Honda CBR650R
 Service manual Honda CBR650
 Owner's Manual Honda PCX125
 Owner's Manual Kawasaki Z1000SX
 Service manual Kawasaki Z1000SX
 Owner's Manual Lexmoto Echo
 Owner's Manual Royal Enfield Interceptor 650
 Service manual Royal Enfield Interceptor 650
 Owner's Manual Yamaha MT-07