 Royal Enfield Interceptor 650 - Service manual > Battery Dismantling
Electrical System / Battery Dismantling
Battery Terminals
- Remove the following parts:
- Side panel RH.
- Rider seat.
- Side panel LH.
- Ensure Ignition and stop switch are in OFF position before disconnecting battery cables.
- Refer general information for battery connection and disconnection procedure.
NOTE
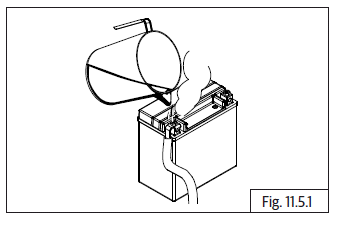
- If battery lead is difficult to disconnect due to rust or corrosion of battery terminals, pour recommended battery terminal cleaning solution on terminals and then try to disconnect.
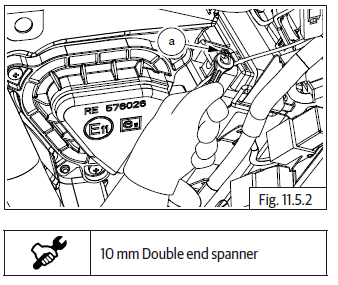
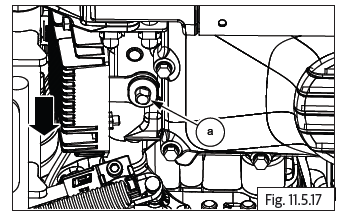
- Disconnect battery negative (-) terminal bolt (a).
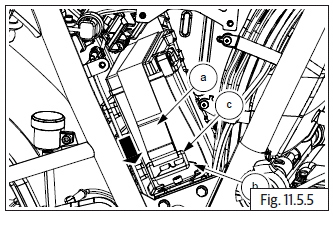
Utility Box
- Remove the following parts:
- Side panel RH.
- Loosen and remove 3 Nos. Hex head bolts (M6) (a) from tool holder (b).
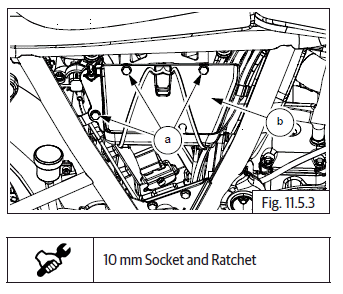
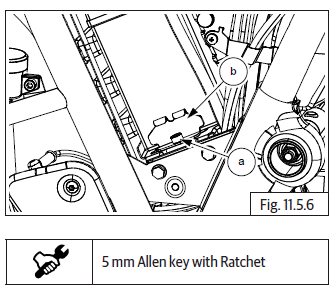
- Disconnect battery positive (+) terminal (a) from battery (b).
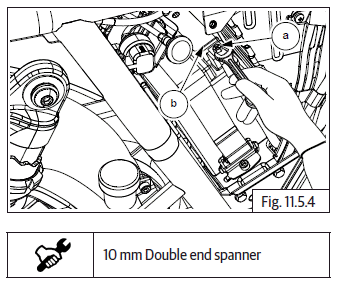
- Pull battery strap (belt) (a) downwards and release strap lock (b) from battery strap bracket (c).
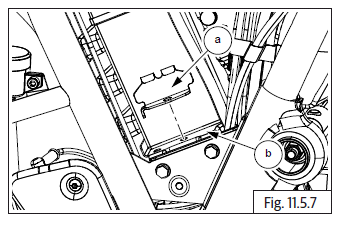
- Loosen and remove Hex flanged head screw (M6) (a) from battery strap bracket (b).
- Remove the battery strap bracket (a) from battery tray (b).
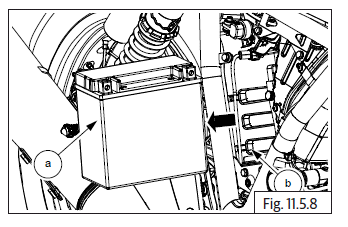
- Remove battery (a) from tray (b).
Battery Tray
- Remove the following parts:
- Rear wheel.
- Engine control unit (ECU).
- Rear mudguard infill cover.
- Starter solenoid from battery tray.
- Loosen and remove the 2 Nos. Hex head collar bolt (M6) (a) from frame RH.
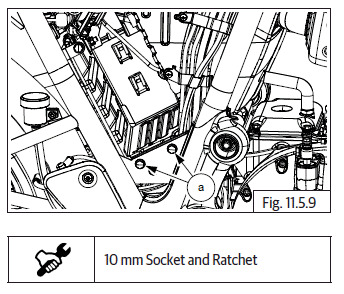
- Loosen and remove the Hex head collar bolt (M6) (a) from frame LH.
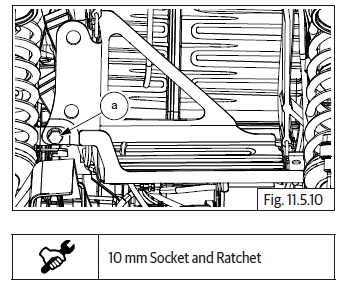
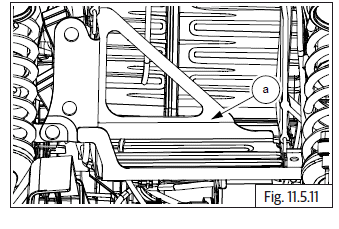
- Ensure wiring harness routing is separated from battery bracket and remove battery tray (a) from frame.
Starter Solenoid
- Remove the following parts:
- Remove rear wheel.
- Remove rear mudguard in fill cover.
- Remove battery positive (+) terminal.
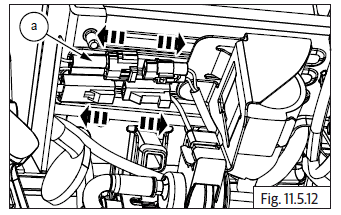
- Disconnect starter solenoid connectors (a). Solenoid connectors are located below battery tray.
- Gently slide out solenoid coil (a) from battery bracket (b) along with battery positive (+)cable.
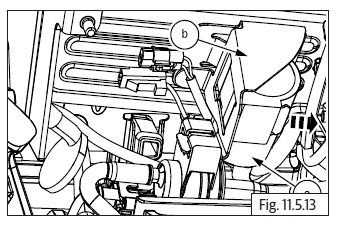
RR Unit
CAUTION Ensure motorcycle is placed on a flat surface, resting it on center stand/ramp.
Support motorcycle with suitable equipment below cradle frame. If necessary.
- Remove charcoal canister.
- Locate RR unit (a) behind engine guide near center stand bracket (b).
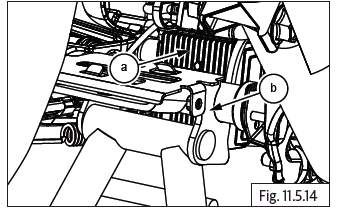
- Disconnect RR unit connectors (a) and connectors (b) from wiring harness.
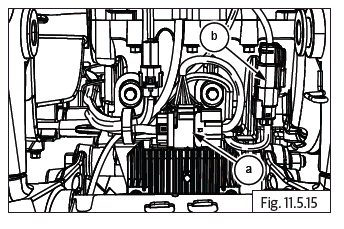
- Loosen and remove 2 Nos. Hex flanged bolts (M6) (a) along with washer to remove RR unit.
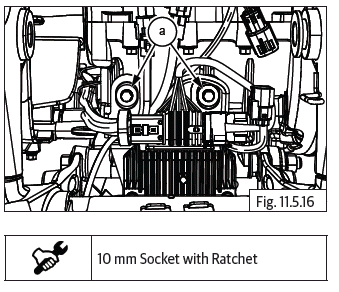
- Gently slide down RR unit (a) from engine guide rear and remove it along with bracket.
See also:
 Royal Enfield Interceptor 650 - Service manual > Trafficators Dismantling
Direction Trafficators - Rear Remove rear number plate bracket. Support and remove tail lamp housing (a) from the frame (b). Loosen and remove hex nut (M12) (a) along with washer (b) to remove rear trafficator (c).
Royal Enfield Interceptor 650 - Service manual > Horn Dismantling/Assembly
Horn Dismantling Disconnect the RH horn connectors (a). Disconnect the LH horn connectors (a). Loosen and remove Hex flange bolt and nut (M8) (a) to remove RH horn bracket. Loosen and remove Hex flange bolt and nut (M8) (a) to remove LH horn bracket.
 Rider's Manual BMW R 1250 GS GSA
 Owner's Manual Harley-Davidson Sportster XL1200X Forty-Eight
 Owner's Manual Honda CBR650R
 Service manual Honda CBR650
 Owner's Manual Honda PCX125
 Owner's Manual Kawasaki Z1000SX
 Service manual Kawasaki Z1000SX
 Owner's Manual Lexmoto Echo
 Owner's Manual Royal Enfield Interceptor 650
 Service manual Royal Enfield Interceptor 650
 Owner's Manual Yamaha MT-07