 Royal Enfield Interceptor 650 - Service manual > Brake Bleeding
CAUTION Ensure the motorcycle is upright on a firm and flat surface.
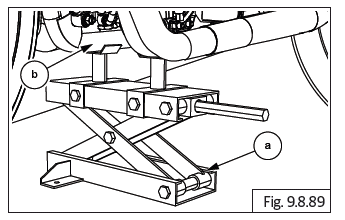
Support motorcycle with suitable equipment below cradle frame.
CAUTION Do not spill brake fluid on any part of the motorcycle as it will damage the painted/ plastic surfaces.
WARNING Ensure brake fluid does not get in contact with eyes and skin. In-case of exposure wash affected area thoroughly with water. Seek medical attention immediately if any irritation persists.
Keep out of reach of children.
Dispose drained brake fluid carefully and responsibly.
WARNING Brake fluid is Hygroscopic hence, absorbs moisture from air. Ensure fluid reservoirs caps are closed properly. If moisture in the brake system may cause damage to brake parts and fluid, causing reduction in braking efficiency; which in turn may lead to fatal accidents.
NOTE
- Use brake fluid from sealed containers only.
- Use only DOT4 specification brake fluid listed in technical specifications.
- Ensure ignition switch and stop switch are in ON position.
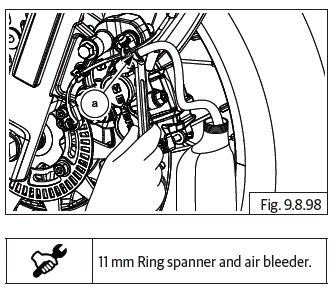
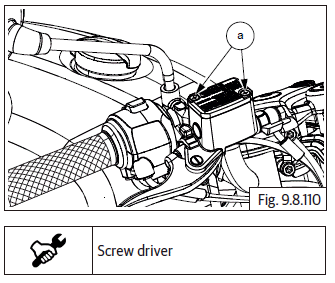
Front Brake Bleeding
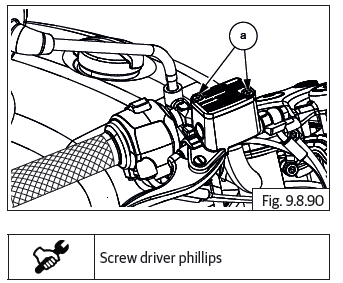
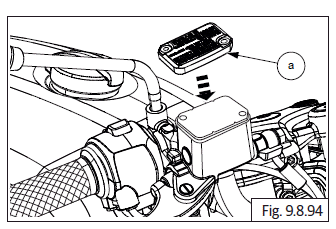
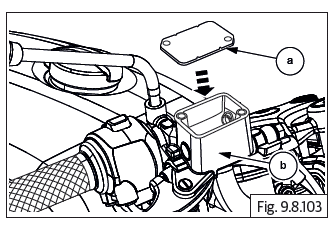
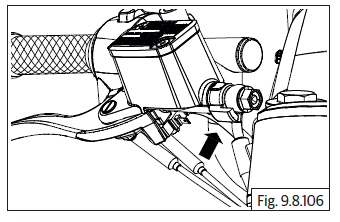
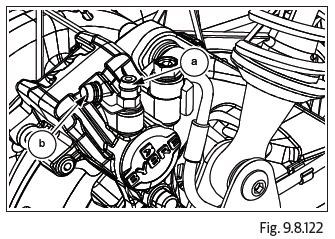
- Loosen and remove 2 Nos. screws (a) from front brake reservoir tank.
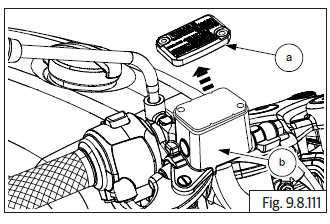
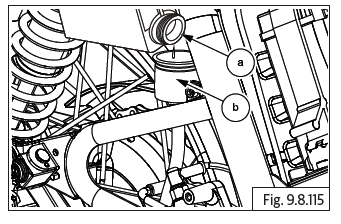
- Remove reservoir cap (a) from front brake reservoir tank (b).
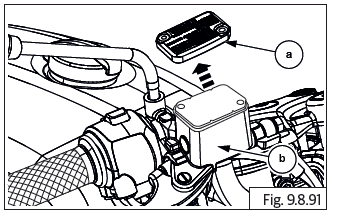
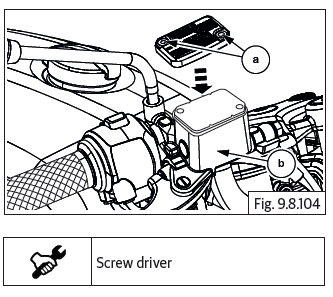
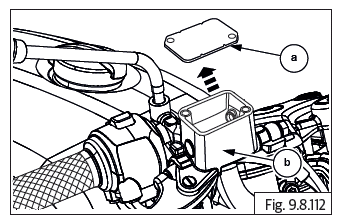
- Remove reservoir diaphragm (a) from front brake reservoir tank (b).
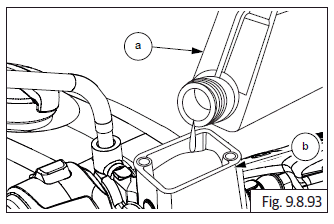
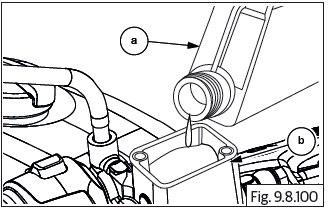
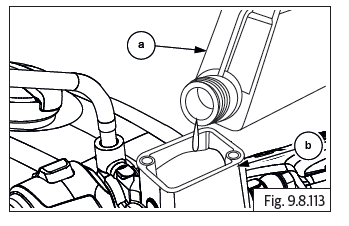
- Gently top up fresh brake fluid (a) into reservoir (b).
- Do not over fill as it may cause malfunctioning of some parts due to brake fluid spillage.
- Locate diaphragm and cap (a) on the reservoir and DO NOT fasten with screws.
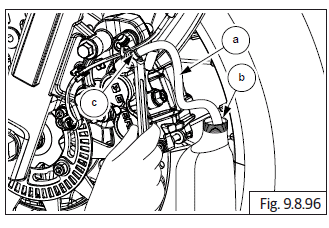
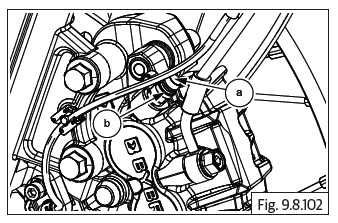
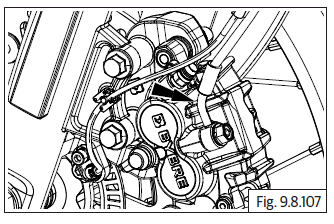
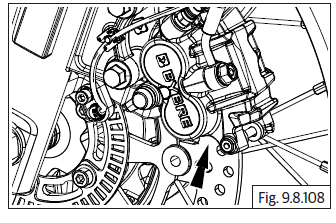
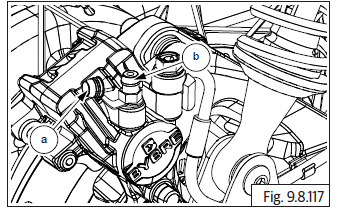
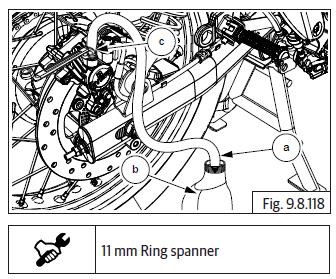
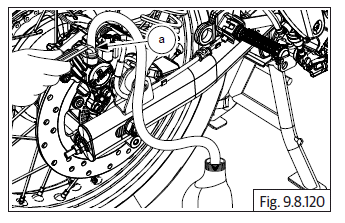
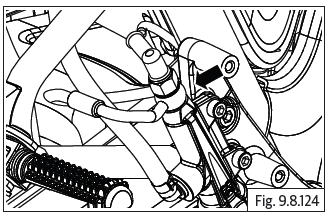
- Remove rubber cap (a) from bleeder valve (b) from front caliper on front wheel RH.

- Dip bleeder hose (a) one end into a container (b) with fresh brake fluid to avoid air passage into bleeder valve.
- Insert bleeder hose other end into bleeder valve (c) on front caliper to drain used oil.
NOTE
- Use brake fluid from new, sealed containers only.
- Use only DOT4 specification brake fluid listed in technical specifications.
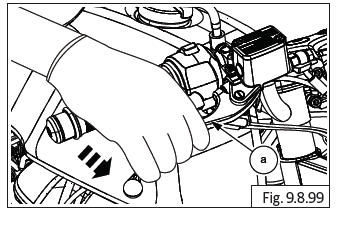
- Gently pump brake lever (a) until brake is effective.
- Once brake lever is effective, hold it in place.
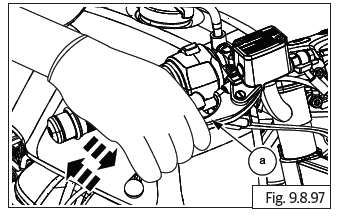
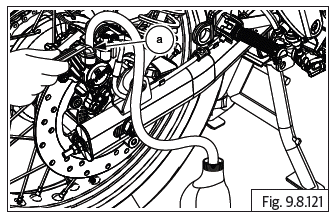
- While holding brake lever, quickly open and close bleeder valve (M6) (a).
- Release the brake lever (a).
- Gently top up fresh brake fluid (a) into reservoir (b).
- Do not over fill as it may cause malfunctioning of some parts due to brake fluid spillage.
- Repeat this operation until air from the system is released completely. Observe bleeder hose. As air in the system is cleared, bubbles stop appearing in hose.
CAUTION While bleeding the brake system always ensure brake fluid is above min level BUT below "Max" level. Never allow the brake fluid go below minimum level to avoid air entering brake system. Always fill the brake fluid from sealed container only.
Do not leave the master cylinder cap and or brake fluid container open for long as brake fluid is highly hygroscopic in nature a and will loose its properties if exposed to atmospheric conditions.
- Inspect brake lever efficiency.
NOTE
- The fluid level must be checked often during the bleeding operation and top up with fresh brake fluid as necessary.
- Gently tap brake hose for proper bleeding performance.
- Check brake fluid level after completion of brake bleeding.
- Whenever the modulator is removed or replaced the brake bleeding time will be longer as brake fluid will have to travel from master cylinder to modulator and then to wheel caliper
- Whenever bleeding the brake system, it is always recommended to bleed both the front and rear brakes.
- Remove bleeder hose (a) from bleeder valve (b).
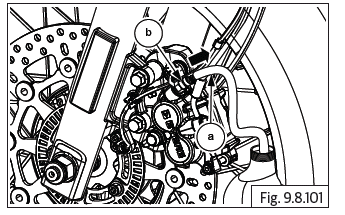
- Close rubber cap (a) on bleeder valve (b).
- Ensure cap is locked properly to avoid exposure to dust or mud.
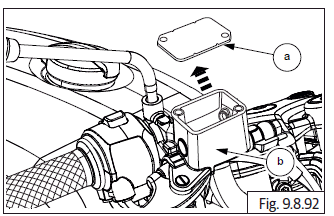
- Install reservoir diaphragm (a) into front brake reservoir tank (b).
- Locate and tighten 2 Nos. screws (a) into front brake reservoir tank (b).
Front Brake Fluid Leakage
CAUTION Ensure motorcycle is placed on a flat surface resting it on ramp/center stand.
NOTE
- Inspect fluid level at every 5000 Km (300 miles). Replace fluid after 25000 Km (1500 miles).
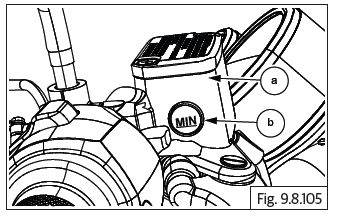
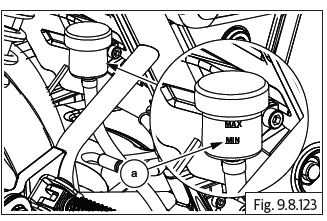
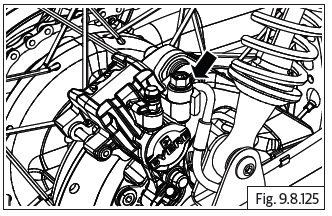
- Inspect fluid level, visible in window glass on front reservoir tank (a).
- Ensure brake fluid level is always above 'MIN' mark (b) on window.
- If oil level is below 'MIN', inspect leakage at front brake hoses and front master cylinder banjo bolt.
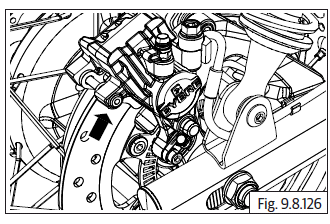
- Inspect leakage at caliper banjo bolt.
- Inspect leakage on brake disc from caliper piston.
- Inspect fluid leakage at hoses at ABS modulator.
Front Brake Fluid Top up
- Loosen and remove 2 Nos. screws (a) from front brake reservoir tank.
- Remove reservoir cap (a) from front brake reservoir tank (b).
- Remove reservoir diaphragm (a) from front brake reservoir tank (b).
- Top up fresh fluid (a) into reservoir tank (b) up to 'MAX' mark on the window.
- Do not over fill as it may cause malfunctioning of some parts due to brake fluid spillage.
Rear Brake Bleeding
CAUTION Ensure the motorcycle is upright on a firm and flat surface.
Support motorcycle with suitable equipment below cradle frame.
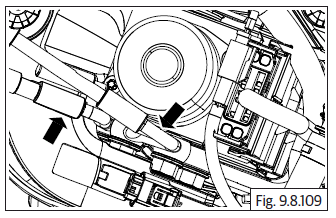
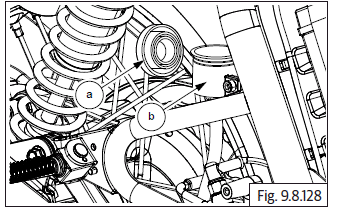
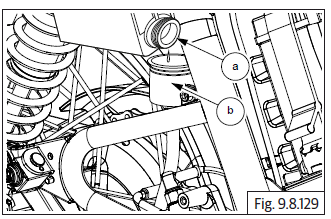
- Rear brake reservoir is located near rear wheel on cradle frame.
- Open rear brake reservoir cap (a) from reservoir (b).

NOTE
- Use brake fluid from sealed containers only.
- Use only DOT4 specification brake fluid listed in technical specification Information.
- Fill fresh brake fluid (a) into reservoir (b).
- Do not over fill as it may cause malfunctioning of some parts due to brake fluid spillage.
- Locate the reservoir cap (a) on the tank and ensure it is seated properly.

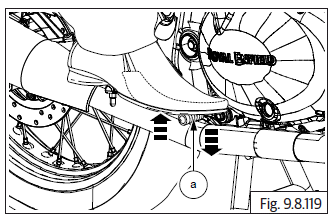
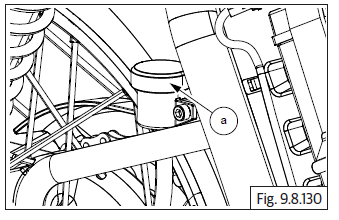
- Locate rear brake bleeder valve on rear wheel brake caliper, behind silencer.
- Open rubber cap (a) from rear brake bleeder valve (b).
- Dip bleeder hose (a) one end into a container (b) with fresh brake fluid to avoid air passage into bleeder valve.
- Insert bleeder hose other end into bleeder valve (M6) (c) on front caliper to drain used oil.
- Gently pump rear brake pedal (a) until pumping becomes hard and then hold it in place.
- While holding brake, quickly open and close bleeder valve (M6) (a).
- Repeat this operation until air from system is released completely.
- Inspect brake lever efficiency.
NOTE
- The fluid level must be checked often during the bleeding operation and top up with fresh brake fluid as necessary.
- Gently tap brake hose for proper bleeding performance.
- Check brake fluid level after completion of brake bleeding.
- Remove bleeder hose (a) from bleeder valve on rear caliper.
- Close bleeder valve (a) rubber cap (b).
- Ensure cap is locked properly to avoid exposure to dust or mud.
Rear Brake Fluid Leakage
CAUTION Ensure the motorcycle is upright on a firm and flat surface.
NOTE
- Inspect fluid level at every 5000Km (3000 miles). Replace fluid after 25000Km (15000 miles).
- Inspect fluid level visible on rear reservoir tank.
- Ensure brake fluid level in rear reservoir tank is always between 'MIN' and 'Max' marks.
- If oil level is below 'MIN', inspect leakage at rear brake hoses and rear master cylinder banjo bolt.
- Inspect leakage at rear caliper banjo bolt.
- Inspect leakage on brake disc from caliper piston.
- Inspect fluid leakage at hoses on ABS modulator.
Rear Brake Fluid Top Up
- Open rear brake reservoir cap (a) from reservoir (b).
- Top up fresh brake fluid (a) into reservoir tank (b) only up to MAX level. Do not over fill as it may cause malfunctioning of some parts due to brake fluid spillage.
- Locate the reservoir cap (a) on the tank and ensure it is seated properly.
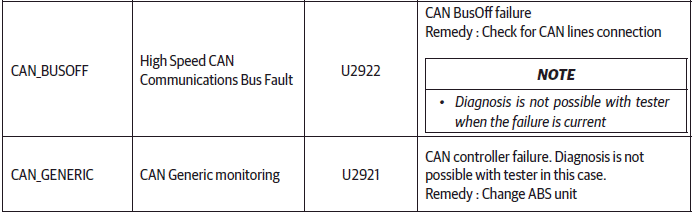
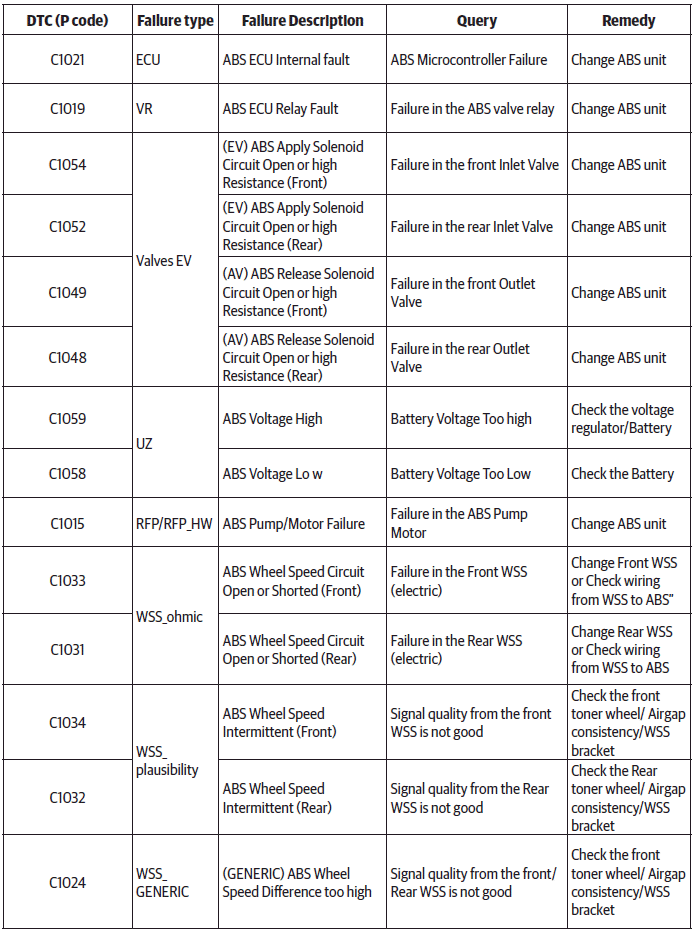
ABS DTC Codes

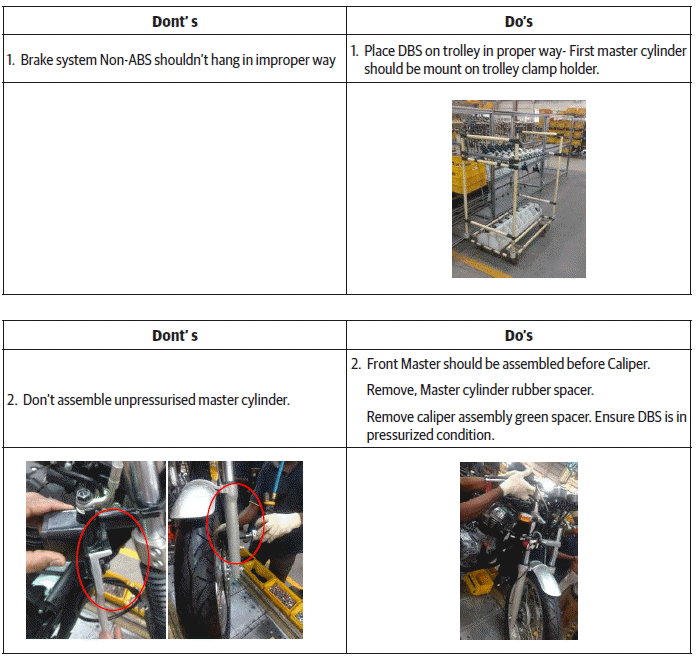
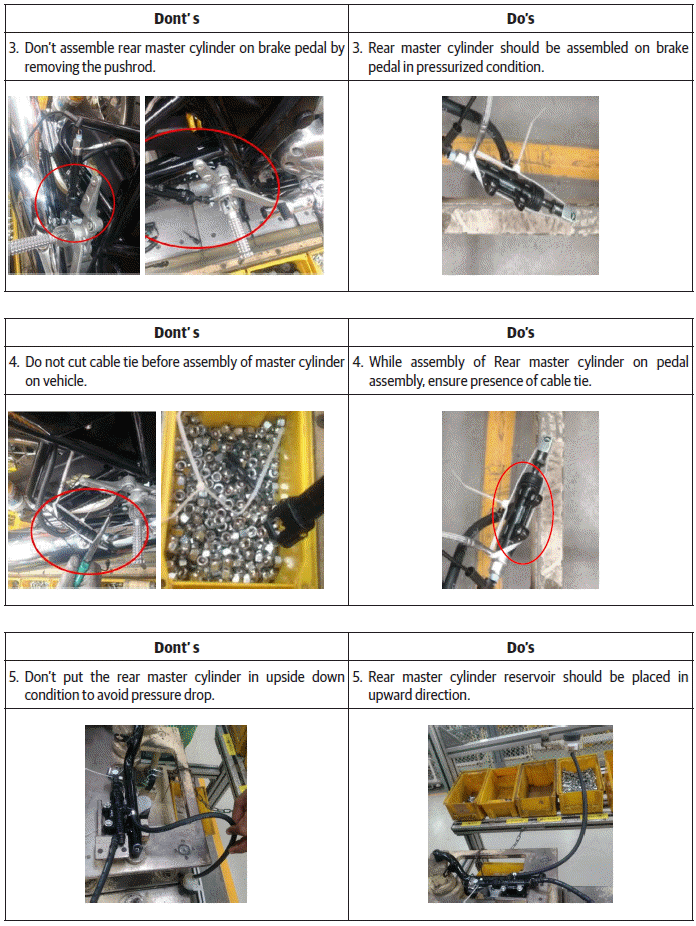
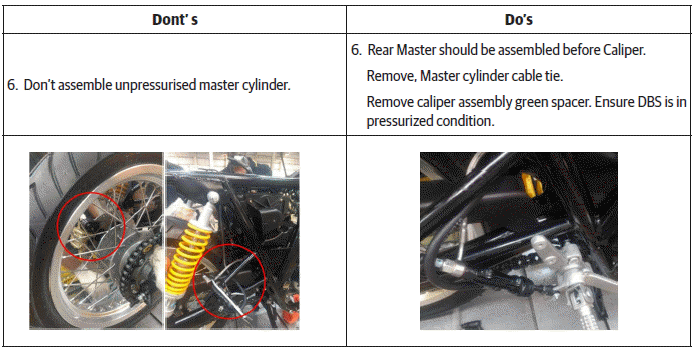
Do's & Dont's
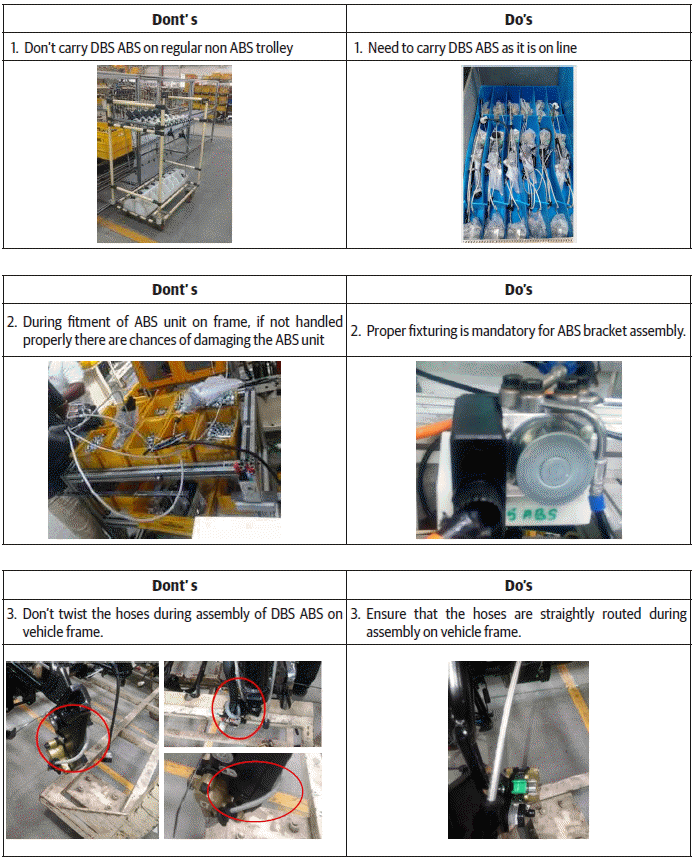

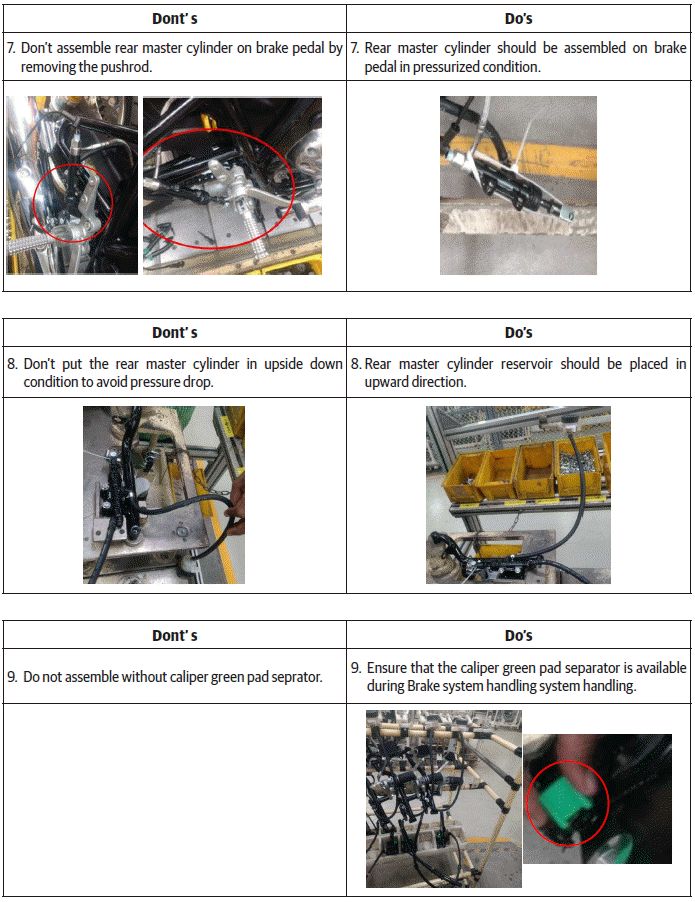
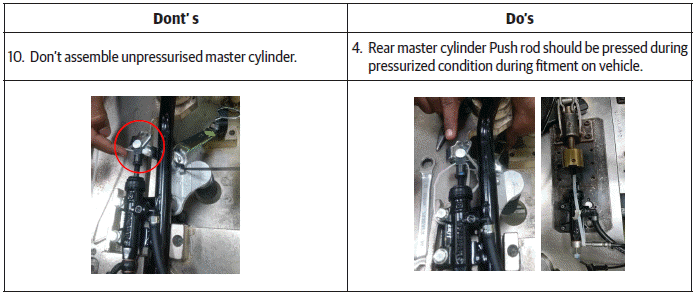
DBS- Non-ABS: Do's - Dont's
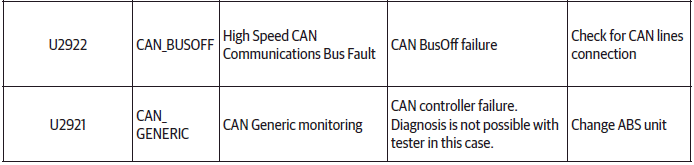
ABS DTC Codes
See also:
 Royal Enfield Interceptor 650 - Service manual > Preparation (Front/Rear Disc Brake)
Preparation (Front Disc Brake) Use a Philips screwdriver to loosen and remove the screws of the front disc brake master cylinder. Remove the cap, and Diaphragm Plate with diaphragm. Remove the dust cap and place the suitable ring spanner on the bleeding nipple and attach a Vinyl Pipe ( transparent). Thereafter, take a Clean glass / Plastic container (transparent) with fresh brake fluid, and dip the other end of the vinyl pipe (transparent) in it (make sure that the vinyl pipe is always submerged in the fluid during the bleeding process). Connect the DOL tool switch "ON" the ignition.
Royal Enfield Interceptor 650 - Service manual > Engine Management System (EMS)
Engine Management System is responsible for controlling the amount of fuel being injected and for adjusting the ignition timing. Optimum functioning of EMS assures maximum engine power with the lowest amount of exhaust emissions and lowest fuel consumption.
 Rider's Manual BMW R 1250 GS GSA
 Owner's Manual Harley-Davidson Sportster XL1200X Forty-Eight
 Owner's Manual Honda CBR650R
 Service manual Honda CBR650
 Owner's Manual Honda PCX125
 Owner's Manual Kawasaki Z1000SX
 Service manual Kawasaki Z1000SX
 Owner's Manual Lexmoto Echo
 Owner's Manual Royal Enfield Interceptor 650
 Service manual Royal Enfield Interceptor 650
 Owner's Manual Yamaha MT-07