 Royal Enfield Interceptor 650 - Service manual > Cradle Assembly RH
WARNING DO NOT tighten bolts during initial installation.
- Support engine suitably and firmly on a work table and ensure it is stable.
- Locate cradle frame RH (a) on engine RH side (b).
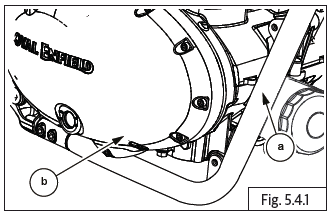
- Align mounting holes (a) of cradle frame with mounting holes on engine.
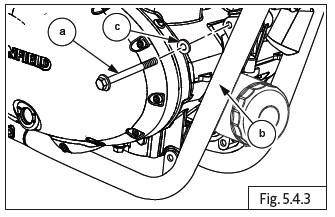
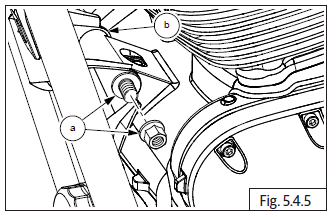
- Insert Hex head bolt long (M10) (a) with washer (c) into mounting holes on cradle frame RH top (b). DO NOT TIGHTEN FULLY.
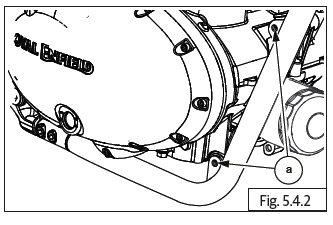
- Insert Hex head bolt small (M10) (a) into mounting holes on cradle frame RH (b) bottom.
- Assemble washer and nut (c) on bolt. DO NOT TIGHTEN FULLY.
Cradle Assembly LH
- Locate cradle frame LH on engine LH side, duly ensuring top mounting on cradle frame is located on bolt.
- Assemble washer and Hex nut (M10) (a) on long bolt (b) on LH and tighten nut just sufficiently. DO NOT TIGHTEN FULLY.
- Align bottom mounting hole of cradle frame LH (a) with mounting hole on engine (b).
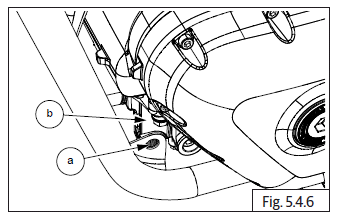
- Insert Hex head bolt small (M10) (a) along with washer (b) into bottom mounting hole on cradle frame front LH (d).
- Assemble washer (b) and nut (c). Tighten just sufficiently. DO NOT TIGHTEN FULLY.
Cradle Frame with Engine to Mainframe
NOTE
- Ensure motorcycle is upright on a firm and flat surface.
- Ensure the front and rear wheels are clamped firmly to motorcycle ramp.
- Slide the cradle frames with engine into main frame only from the LH side and with rear end of engine into mainframe first.
- Ensure frame adjusters at rear end of mainframe and all other mounting holes are aligned correctly with cradle frames for ease of assembly.
- Lift engine with cradle frame into mainframe by suitable supporting from the bottom of engine.
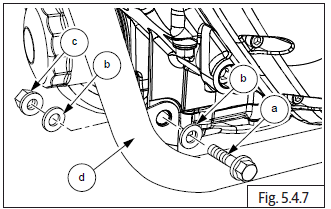
- Insert Hex flange head bolt long (M10) into bottom rear mounting on frame LH.
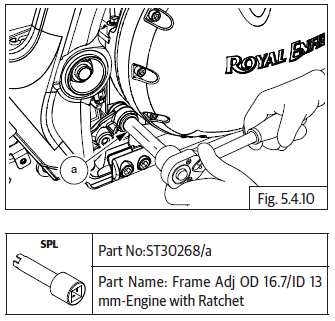
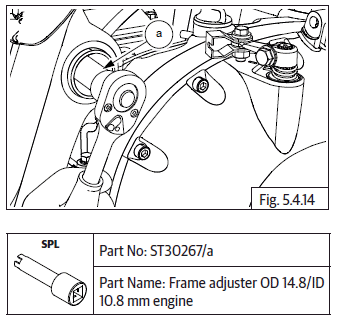
- Insert adjuster (a) on rear bottom frame (b).
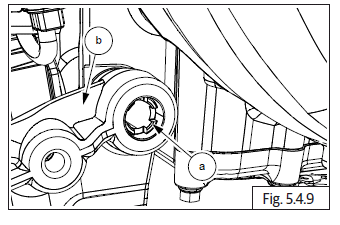
- Place special tool on adjuster (a) and gently adjust till frame holds engine properly.
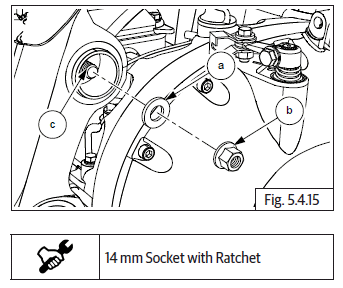
- Insert thick washer (a) and Hex nut (M10) (b) into other end of lower rear crankcase mounting bolt (c) and gently tighten nut (b).
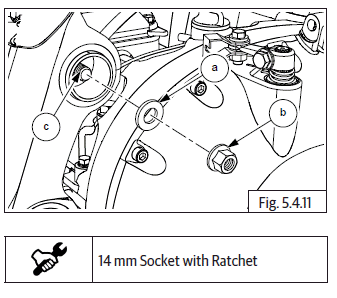
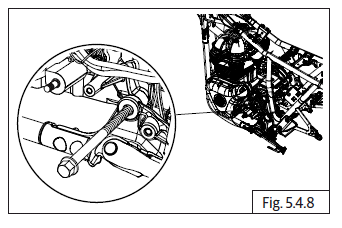
- Insert Hex head flanged mounting bolt (M10) (a) on engine rear top from LH frame along with spacer (b). DO NOT TIGHTEN FULLY.
- Gently locate RH spacer (a) on rear top of RH frame.
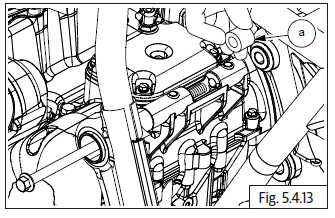
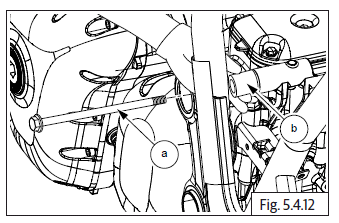
- Place special tool on adjuster (a) on RH and gently adjust to align the engine to frame.
- Locate thick washer (a) along with Hex nut (M10) (b) on other end of crankcase mounting bolt (c) on cradle frame RH. Tighten the nut just sufficiently.
Cradle Frame Top Mountings
Cradle Frame Top Mountings to Main Frame
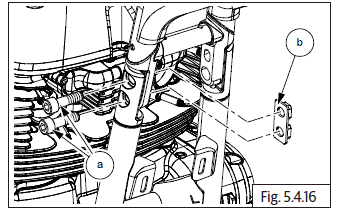
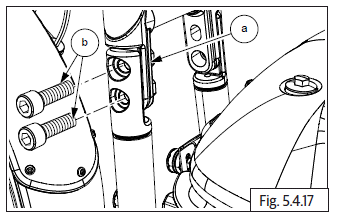
- Locate 2 Nos. Hex socket bolts (M10) (a) and nut, locating back plate (b) on RH cradle frame top to main frame. DO NOT TIGHTEN FULLY.
- Locate back plate (a) with 2 Nos. Hex socket bolts (M10) (b) on LH cradle frame top to main frame. DO NOT TIGHTEN FULLY.
Cradle Frame Bottom Mountings
Cradle Frame Bottom Mounting LH to Main Frame
- Align lower part of cradle frame to main frame LH.
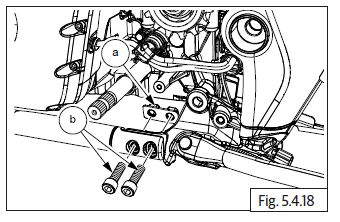
- Locate back plate (a) with 2 Nos. Hex socket bolts (M10) (b) on rear LH cradle frame bottom to main frame. DO NOT TIGHTEN FULLY.
Cradle Frame Bottom Mounting RH
Cradle Frame Bottom Mounting RH to Main frame
- Align lower part of cradle frame to main frame RH.
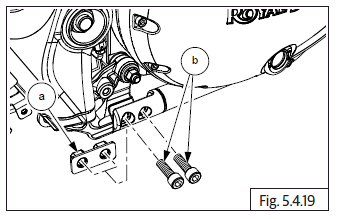
- Locate back plate (a) with 2 Nos. Hex socket bolts (M10) (b) on rear RH cradle frame bottom to main frame. DO NOT TIGHTEN FULLY.
Cradle Frame Mounting Final Torque
Cradle Frame to Engine Mounting Final Torque
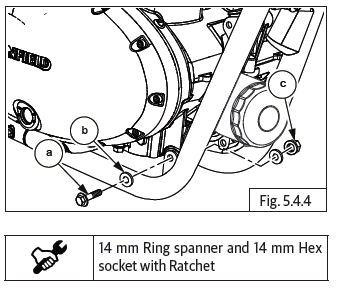
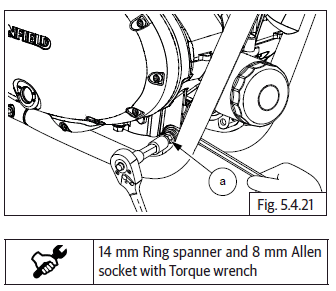
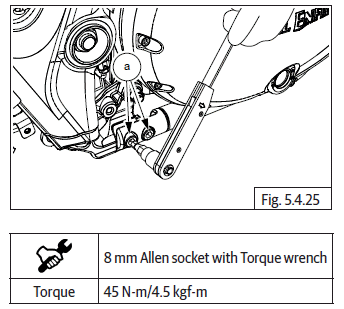
- Hold Hex nut (M10) (a) and tighten the bolt to specified torque.
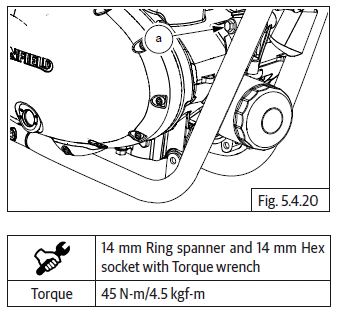
- Tighten Hex head bolt (M10) (a) into mounting holes on cradle frame RH bottom to torque.
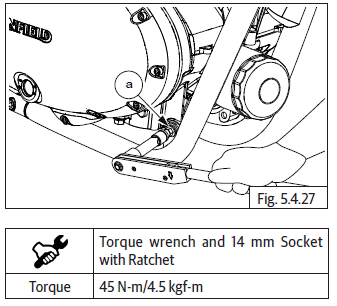
- Tighten 2 Nos. Hex socket bolts (M10) (a) on front LH cradle frame to main frame.
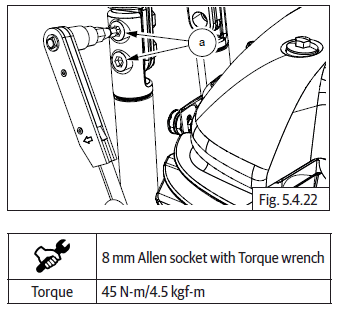
- Tighten 2 Nos. Hex socket bolts (M10) (a) on front RH cradle frame to main frame.
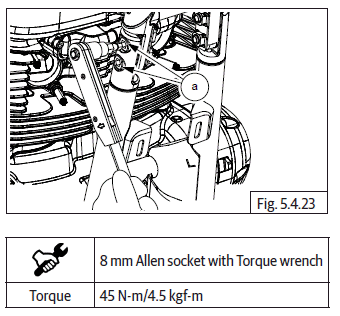
- Tighten 2 Nos. Hex socket bolts (M10) (a) on rear LH cradle frame to main frame.
- Tighten 2 Nos. Hex socket bolts (M10) (a) on rear RH cradle frame to main frame to torque.
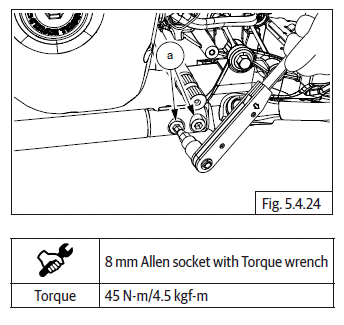
- Hold nut and tighten upper front crankcase mounting Hex bolt (M10) (a) to torque.
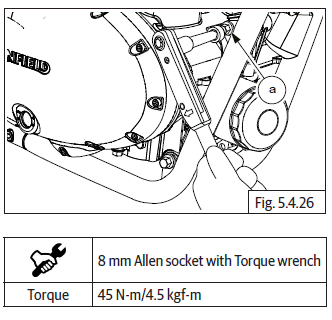
- Hold nut and tighten lower front crankcase mounting Hex bolt (M10) (a) to torque.
See also:
 Royal Enfield Interceptor 650 - Service manual > Engine Assembly to Frame
Engine Assembly into Main Frame Cradle Frame Assembly into Engine
Royal Enfield Interceptor 650 - Service manual > Engine Cylinder Head Steady Bracket
Locate the steady brackets (a) into LH and RH frames (b). Locate and tighten 4 Nos. Hex bolts (M8) (a) on brackets (b) holding main frame to torque. Insert Hex socket bolt (M10) (a) from LH steady bracket into RH steady bracket (b). Hold LH Hex socket bolt with suitable tool. Assemble washer and Hex nut (M10) (a) from RH and tighten nut to specified torque.
 Rider's Manual BMW R 1250 GS GSA
 Owner's Manual Harley-Davidson Sportster XL1200X Forty-Eight
 Owner's Manual Honda CBR650R
 Service manual Honda CBR650
 Owner's Manual Honda PCX125
 Owner's Manual Kawasaki Z1000SX
 Service manual Kawasaki Z1000SX
 Owner's Manual Lexmoto Echo
 Owner's Manual Royal Enfield Interceptor 650
 Service manual Royal Enfield Interceptor 650
 Owner's Manual Yamaha MT-07