 Kawasaki Z1000SX - Service manual > Cylinder Head Cover
- Remove:
Lower Fairing (see Lower Fairing Removal in the Frame chapter)
Air Cleaner Housing (see Air Cleaner Housing Removal in the Fuel System (DFI) chapter) - Drain the coolant (see Coolant Change in the Periodic Maintenance chapter).
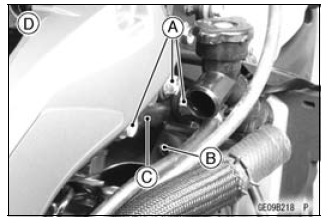
- Remove:
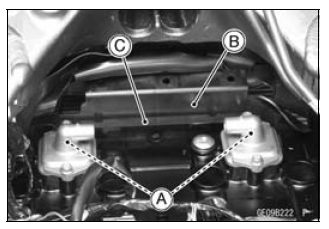
Radiator Cap Mounting Bolt [A]
Clamp [B]
Water Hose [C]

- Remove:
Bolts [A]
Quick Rivets [B]
Brackets [C]
Right Side [D]
Left Side [E]
- Remove:
Air Switching Valve (see Air Switching Valve Removal)
Stick Coils (see Stick Coil Removal in the Electrical System chapter)
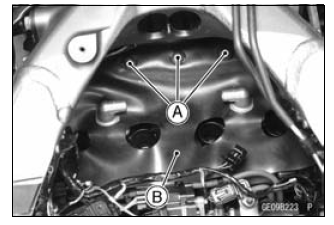
Quick Rivets [A] - Pull up the rubber cover [B] forward.
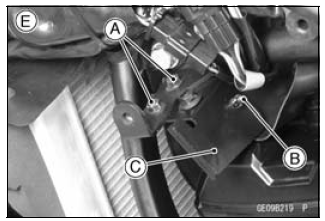
- Remove:
Air Suction Valves [A] (see Air Suction Valve Removal)
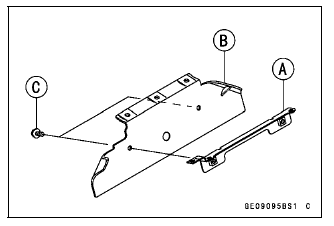
Hot Windshield [B] and Air Suction Valve Cover Bracket [C]
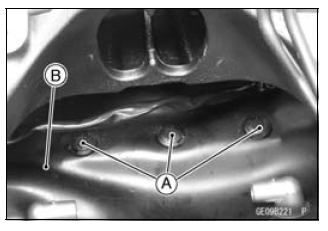
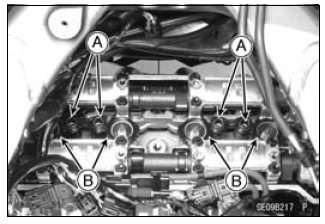
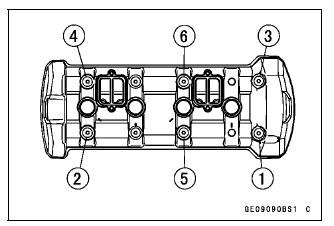
- Remove:
Cylinder Head Cover Bolts [A]
Cylinder Head Cover
Cylinder Head Cover Installation
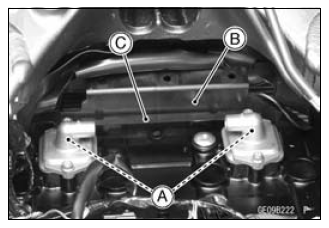
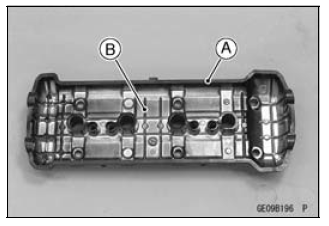
- Install:
Dowel Pins [A]
Plug Hole Gaskets [B]
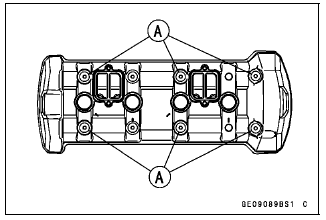
- Apply liquid gasket [A] to the cylinder head as shown.
- Using a high-flash point solvent, clean off any oil or dirt that may be on the liquid gasket coating area. Dry them with a clean cloth.
Sealant - Liquid Gasket, TB1216B: 92104-1064

- Replace the head cover gasket [A] with a new one.
- Install the gasket to the cylinder head cover [B].
- While pulling up the water hose on radiator cap, install the cylinder head cover from the right side.
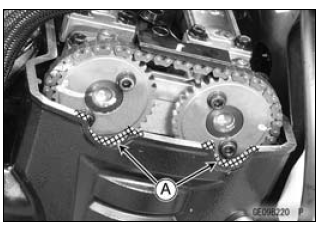
- Apply sorp and water solution or rubber lubricant to the both surface of the washers.
- Install the washers with the metal side [A] faces upward.

- Tighten the cover bolts following the specified tightening sequence.
Torque - Cylinder Head Cover Bolts: 9.8 N*m (1.0 kgf*m, 87 in*lb)
- Install:
Air Suction Valves [A] (see Air Suction Valve Installation)
Hot Windshield [B] and Air Suction Valve Cover Bracket [C]
If the air suction valve cover bracket [A] and hot windshield [B] has been disassembled, assemble them and note the following.
- Tighten the hot windshield mounting bolts [C].
Torque - Hot Windshield Mounting Bolts: 9.8 N*m (1.0 kgf*m, 87 in*lb)
- Install the quick rivets [A].
- Position the rubber cover [B] on the cylinder head cover as shown.
- Install the removed parts (see appropriate chapters).
See also:
 Kawasaki Z1000SX - Service manual > Clean Air System
Air Suction Valve Removal Remove: Lower Fairing (see Lower Fairing Removal in the Frame chapter) Air Switching Valve (see Air Switching Valve Removal) Stick Coil Connector (see Stick Coil Removal in the Electrical System chapter) Connector [A] (from Bracket [B] at Left Side) Air Suction Valve Cover Bolts [C] and Bracket Air Suction Valve Covers [D] (Both Sides) Remove the air suction valves [A] on both sides.
Kawasaki Z1000SX - Service manual > Camshaft Chain Tensioner
Camshaft Chain Tensioner Removal NOTICE This is a non-return type camshaft chain tensioner. The push rod does not return to its original position once it moves out to take up camshaft chain slack.
 Rider's Manual BMW R 1250 GS GSA
 Owner's Manual Harley-Davidson Sportster XL1200X Forty-Eight
 Owner's Manual Honda CBR650R
 Service manual Honda CBR650
 Owner's Manual Honda PCX125
 Owner's Manual Kawasaki Z1000SX
 Service manual Kawasaki Z1000SX
 Owner's Manual Lexmoto Echo
 Owner's Manual Royal Enfield Interceptor 650
 Service manual Royal Enfield Interceptor 650
 Owner's Manual Yamaha MT-07