 Royal Enfield Interceptor 650 - Service manual > Engine Oil
Engine / Engine Removal from Main Frame / Engine Oil
NOTE
- Ensure the motorcycle is placed on a firm flat surface, resting it on the center stand/ramp.
- Before starting the dismantling process, start the engine and let the engine warm up for a few minutes and then turn it OFF.
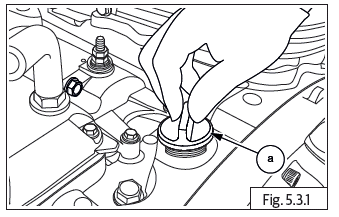
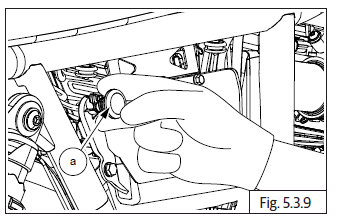
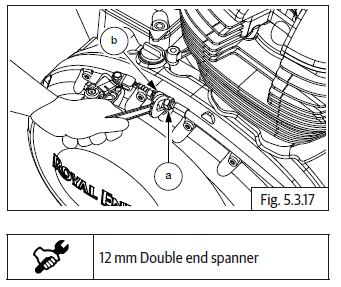
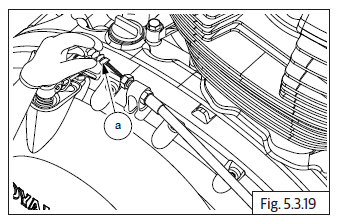
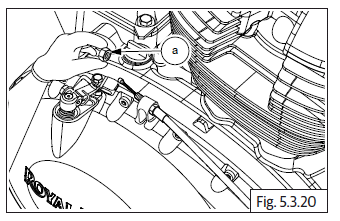
- Remove engine oil filler cap (a).
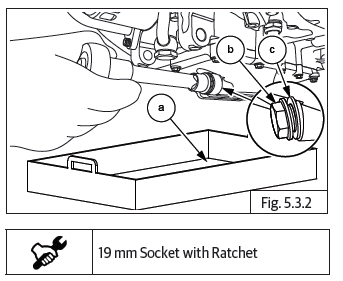
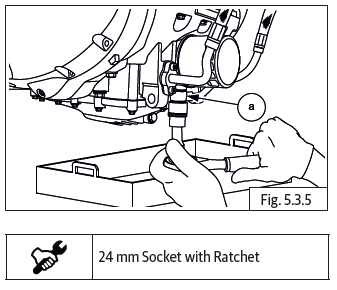
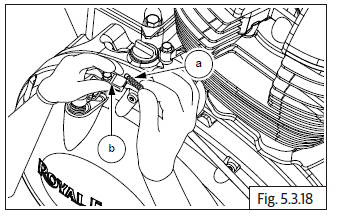
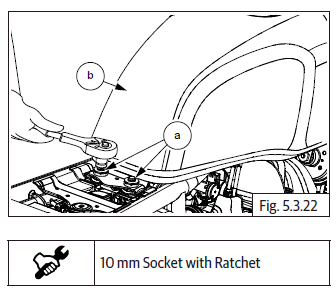
- Place a tray (a) under engine oil magnetic drain plug (M14) (b). Remove it along with washer (c) to drain oil completely from engine.
Oil Cooler Inlet and Outlet Pipes
NOTE
- Ensure the oil is fully drained and keep a container underneath the engine to avoid oil spilling on floor.
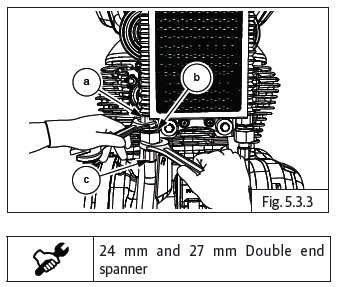
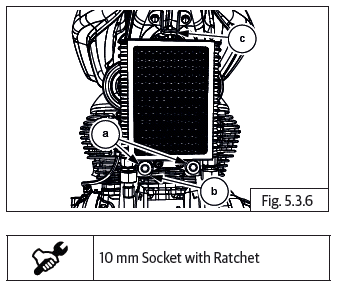
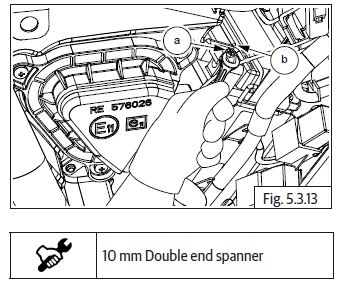
- Support the top nut (M16) (a) suitably and loosen the bottom Hex nut (M18) (b) located on oil cooler hose (c).
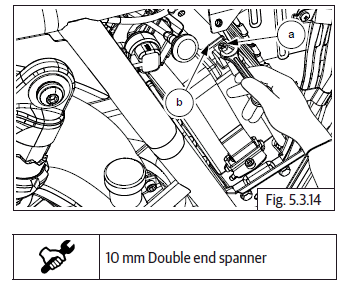
- Loosen and remove 2 Nos. Hex socket screws (M6) (a) to disconnect oil cooler inlet pipe (b) from engine.
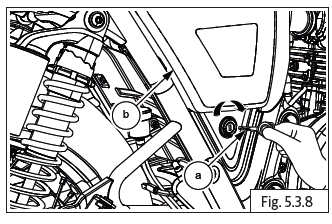
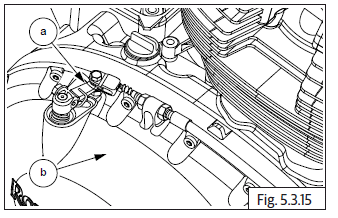
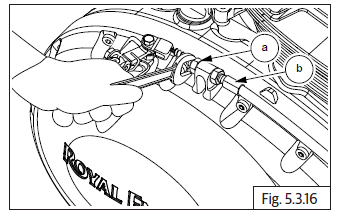
- Loosen and remove bolt union crankcase (M16) (a) along with washer located below front bottom of engine.
- Disconnect 2 Nos. inlet pipe lines one by one.
NOTE
- Cover the pipe ends and cooler ends with suitably to avoid dust entry.
Oil Cooler Mountings on Frame
- Loosen and remove 2 Nos. Hex flange head bolts (M6) (a) along with washers and nuts from oil cooler mounting frame (b).
- Gently push cooler top mounting bush (c) downwards to remove cooler from frame.
NOTE
- Ensure to cover the cooler pipe ends suitably to avoid exposure to dust.
CAUTION Do not damage cooler fins. Carefully handle the cooler and place it in a safe location.
Oil Filter
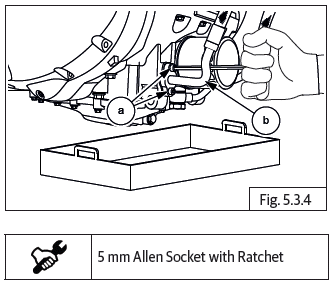
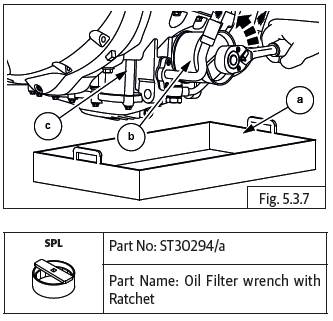
- Place a tray under engine oil filter (a).
- Loosen and remove using special tool (b) from the front bottom of engine (c).
Side Panel RH
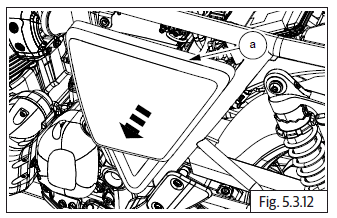
- Insert motorcycle/ignition key (a) and turn clockwise to unlock and remove RH side panel (b) from motorcycle.
Seat Assembly
- Locate seat lock (a) on RH side of motorcycle near to the RH panel.
- Pull/Release seat lock (a) to remove seat from motorcycle.
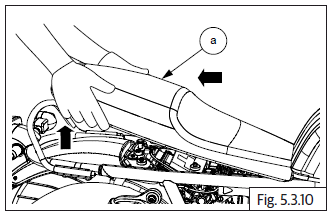
- Gently lift and pull seat (a) from rear side of motorcycle and place it in a safe location to prevent from scratches and dirt.
Side Panel LH
- Loosen and remove Phillips head screw (a) located near to Engine control unit (ECU) (b).
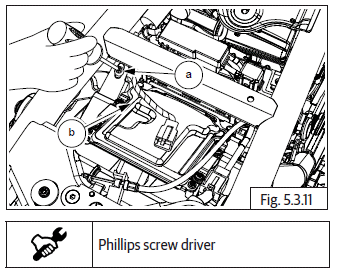
- Gently slide and remove LH panel (a) from motorcycle.
Battery Connections
NOTE
- Ensure ignition and stop switches are in OFF position before disconnecting battery cables.
- Loosen and remove Hex head bolt (M6) (a) to disconnect negative (-) terminal from battery (b).
- Loosen and remove Hex head bolt (M6) (a) to disconnect positive (+) terminal from battery (b).
Clutch Cable
- Disconnect the clutch cable from handlebar lever. Refer clutch lever dismantling.
- Locate clutch cable actuating assembly (a) on the clutch cover (b).
- Loosen outer lock nut (M8) (a) from rear of cable adjuster (b).
- Loosen inner locknut (M8) (a) fully and pull adjuster from housing cable guide (b).
- Release inner cable (a) from clevis on clutch actuating assembly (b).
- Remove rubber grommet (a).
- Remove outer lock nut (a).
- Remove clutch cable (a) from cable guide (b).

- Loosen and remove 2 Nos. Hex head bolts (M6) (a) on rear end of fuel tank (b).
See also:
 Royal Enfield Interceptor 650 - Service manual > Engine Removal from Main Frame
Engine Removal from Main Frame Cradle Frame Removal from Engine
Royal Enfield Interceptor 650 - Service manual > Fuel Pump Connector and Fuel Level Sensor
Gently lift the fuel tank upwards to access the fuel pump connector. Disconnect the fuel pump connector (a) from fuel tank (b). Disconnect fuel level sensor connector (a) from fuel tank (b).
 Rider's Manual BMW R 1250 GS GSA
 Owner's Manual Harley-Davidson Sportster XL1200X Forty-Eight
 Owner's Manual Honda CBR650R
 Service manual Honda CBR650
 Owner's Manual Honda PCX125
 Owner's Manual Kawasaki Z1000SX
 Service manual Kawasaki Z1000SX
 Owner's Manual Lexmoto Echo
 Owner's Manual Royal Enfield Interceptor 650
 Service manual Royal Enfield Interceptor 650
 Owner's Manual Yamaha MT-07