 Kawasaki Z1000SX - Service manual > Exploded View, Specifications, Special Tools
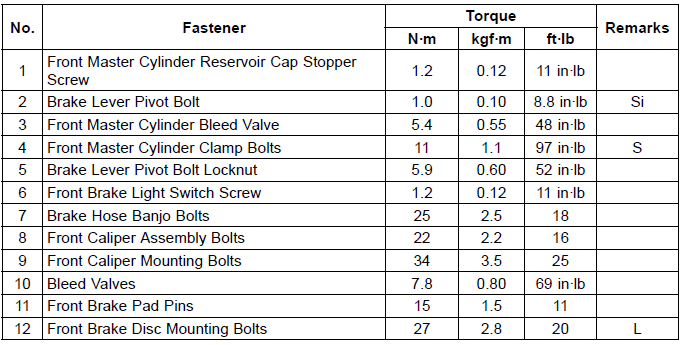
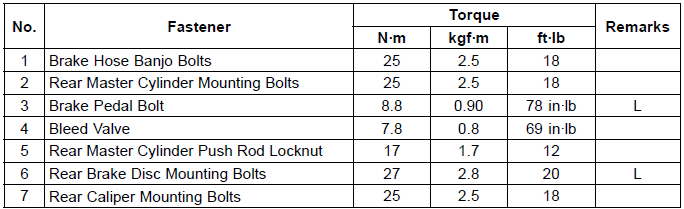
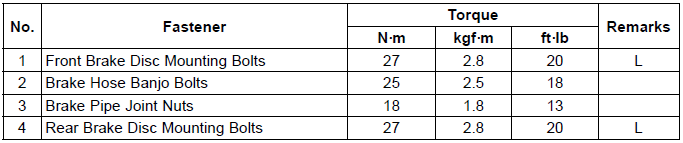
Exploded View
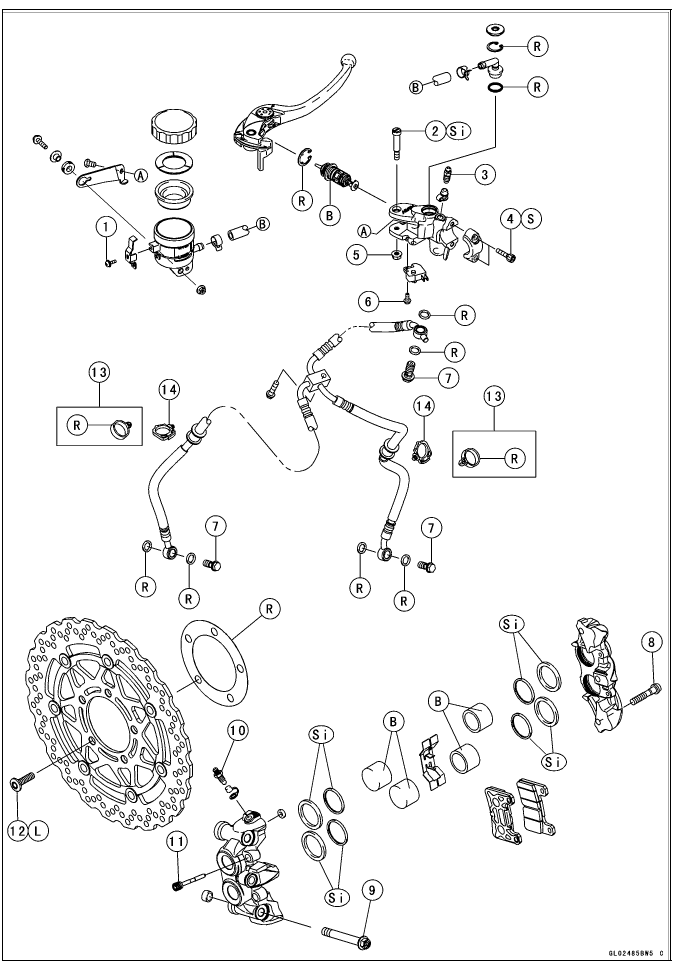
13. ZX1000GB Early Model
14. Face the lock portion of the clamp backward.
B: Apply brake fluid.
L: Apply a non-permanent locking agent.
R: Replacement Parts
S: Follow the specified tightening sequence.
Si: Apply silicone grease (ex. PBC grease).
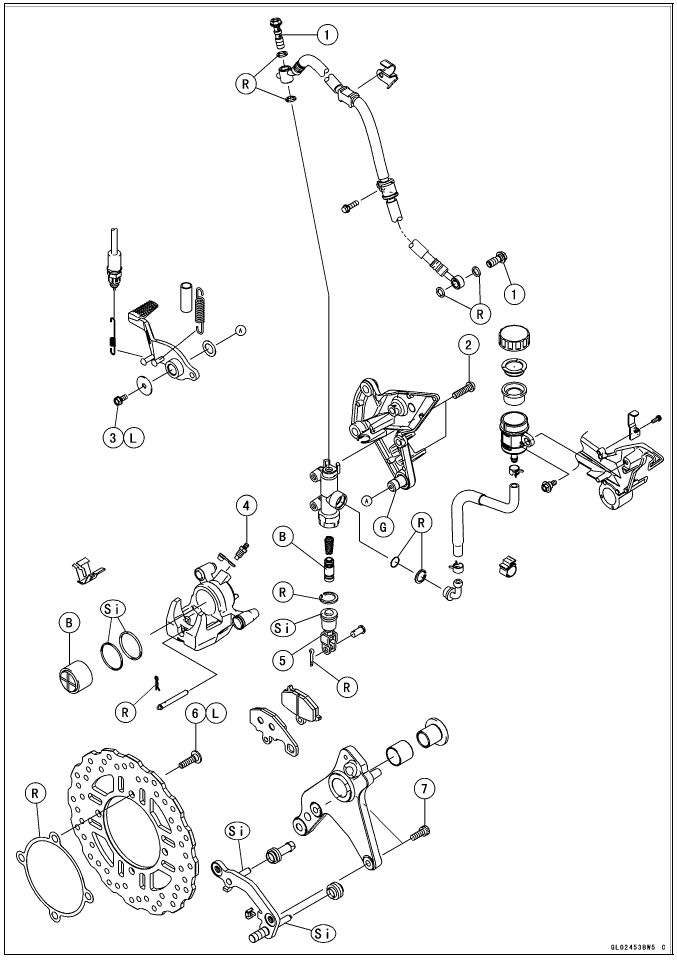
B: Apply brake fluid.
G: Apply grease.
L: Apply a non-permanent locking agent.
R: Replacement Parts
Si: Apply silicone grease (ex. PBC grease).
ABS Equipped Models
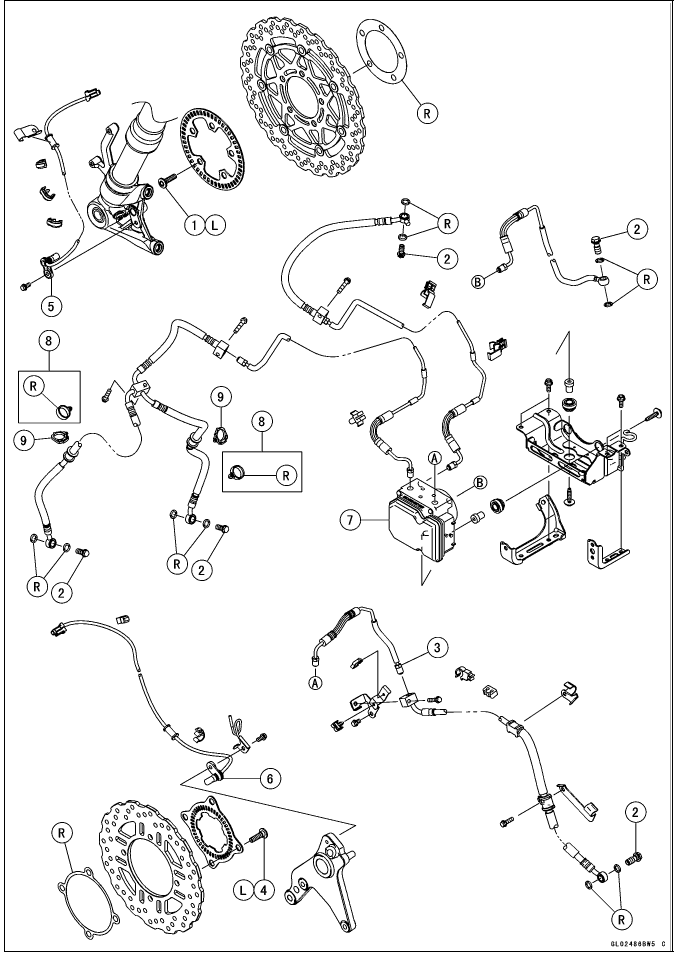
5. Front Wheel Rotation Sensor
6. Rear Wheel Rotation Sensor
7. ABS Hydraulic Unit
8. ZX1000HB Early Model
9. Face the lock portion of the clamp backward.
L: Apply a non-permanent locking agent.
R: Replacement Parts
NOTE
- When disassembling the brake hose and pipe, disassemble them by the unit as shown in the exploded view.
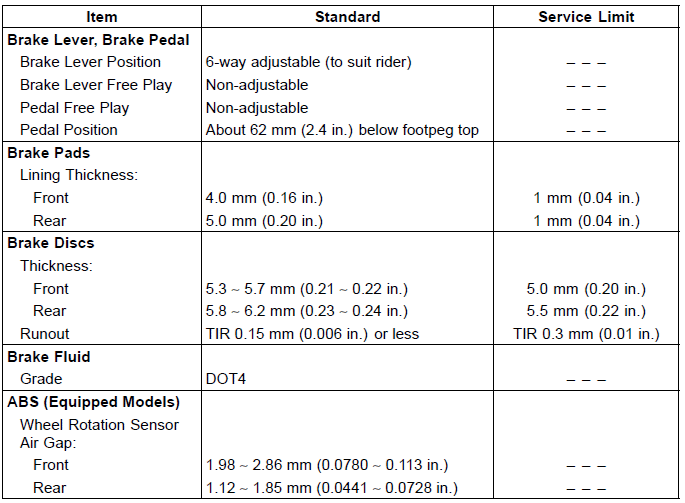
Specifications
Special Tools
Jack: 57001-1238
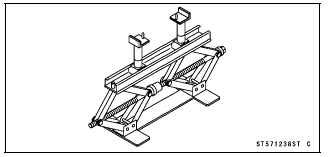
Jack Attachment: 57001-1608
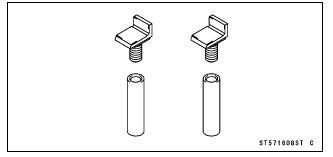
Attachment Jack: 57001-1252

See also:
 Kawasaki Z1000SX - Service manual > Brake Lever, Brake Pedal
Brake Lever Position Adjustment The brake lever adjuster has 6 positions so that the brake lever position can be adjusted to suit the operator's hand. Push the lever forward and turn the adjuster [A] to align the number with the arrow mark [B] on the lever holder. The distance from the grip to the lever is minimum at number 6 and maximum at number 1.
 Rider's Manual BMW R 1250 GS GSA
 Owner's Manual Harley-Davidson Sportster XL1200X Forty-Eight
 Owner's Manual Honda CBR650R
 Service manual Honda CBR650
 Owner's Manual Honda PCX125
 Owner's Manual Kawasaki Z1000SX
 Service manual Kawasaki Z1000SX
 Owner's Manual Lexmoto Echo
 Owner's Manual Royal Enfield Interceptor 650
 Service manual Royal Enfield Interceptor 650
 Owner's Manual Yamaha MT-07