 Royal Enfield Interceptor 650 - Service manual > Oil Cooler Inlet and Outlet Pipes
Engine / Engine Assembly to Frame / Oil Cooler Inlet and Outlet Pipes
Oil Cooler Inlet and Outlet Pipes to Engine
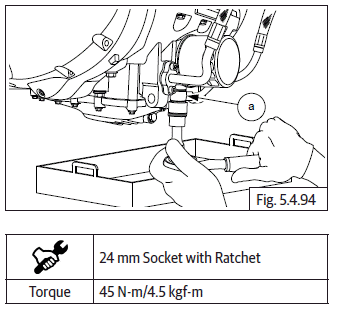
- Insert bolt union crankcase (M16) (a) along with washers and tighten to specified torque.
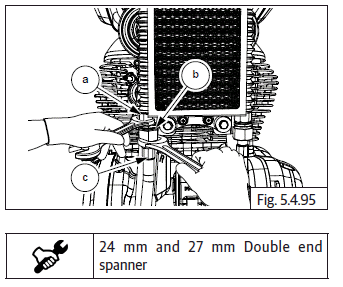
- Tighten bolt (M18) (a) on oil cooler hose (b) by supporting (M16) (c) bolt on top.
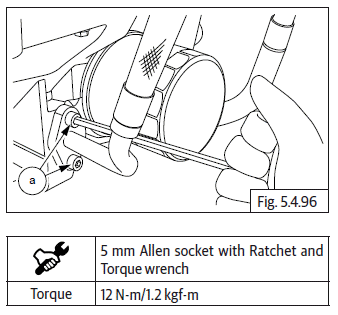
- Tighten oil cooler inlet pipe with 2 Nos. Hex socket screws (M6) (a).
Drain Bolt and Engine Oil Re-fill
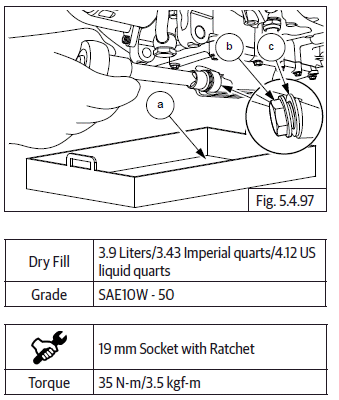
- Place a container (a) under engine oil drain bolt (M14) (b).
- Refill engine oil with recommended quantity.
- Insert and tighten drain bolt (M14) (b) along with washer (c).
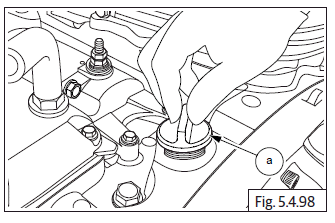
- Assemble engine oil filler cap (a).
- Start and warm up engine for 2 to 3 minutes and then turn it off.
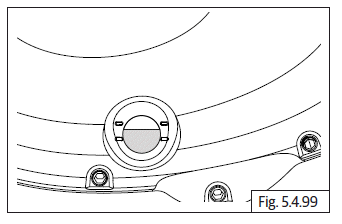
- Check oil level through oil level window.
See also:
 Royal Enfield Interceptor 650 - Service manual > Fuel Tank
Locate and slide the fuel tank into front frame guides (a). EVAP to Fuel Tank Connections Connect drain connection hose (a) to fuel tank (b). Connect the EVAP connection hose (a) to the fuel tank (b).
Royal Enfield Interceptor 650 - Service manual > Engine Dismantling
NOTE Ensure the engine is properly clamped on the holding fixture on a worktable. Ensure the engine is clean and free of any oil residue/dirt. Clean engine with recommended degreasing agents/solvents to remove oil residue/dirt. Ensure worktable is clean and atmosphere is dust free.
 Rider's Manual BMW R 1250 GS GSA
 Owner's Manual Harley-Davidson Sportster XL1200X Forty-Eight
 Owner's Manual Honda CBR650R
 Service manual Honda CBR650
 Owner's Manual Honda PCX125
 Owner's Manual Kawasaki Z1000SX
 Service manual Kawasaki Z1000SX
 Owner's Manual Lexmoto Echo
 Owner's Manual Royal Enfield Interceptor 650
 Service manual Royal Enfield Interceptor 650
 Owner's Manual Yamaha MT-07