 Royal Enfield Interceptor 650 - Service manual > Reed Valves
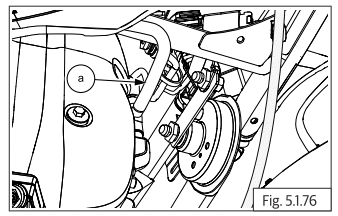
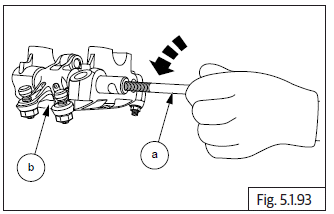
- Disconnect the hose (a) from the reed valve tube on the front side of cylinder head.
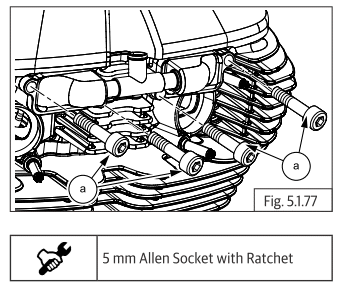
- Loosen and remove 4 Nos. Hex socket head screws (M6) (a) holding reed valves to cylinder head.
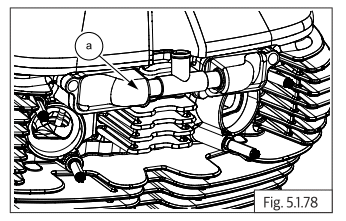
- Remove reed valve (a) from the cylinder head.
Cylinder Head Cover
- Remove the following parts:
- Side panels LH and RH.
- Rider seat assembly.
- Fuel tank assembly. Ensure the fuel is drained completely.
- Loosen ABS modulator bracket and support it suitably above the frame.
- Remove Horn assembly.
- Loosen HT coil from frame and support suitably.
WARNING Gasoline is extremely flammable and highly explosive. Please handle with care. Improper handling can lead to fatal accident OR serious injury. Always drain/fill fuel only in a well ventilated area. Ensure there is no scope for flames OR sparks near by while draining/filling fuel.
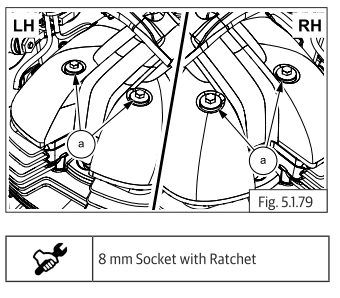
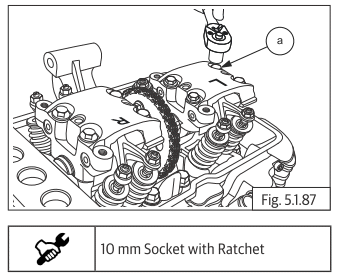
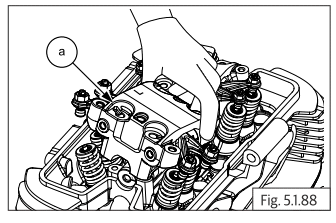
- Loosen and remove 4 Nos. Hex flange head bolts (M5) (a) in crisscross pattern along with the rubber seals and washers.
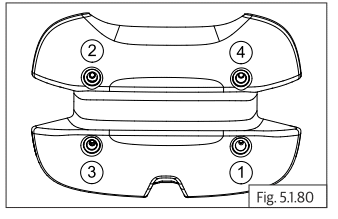
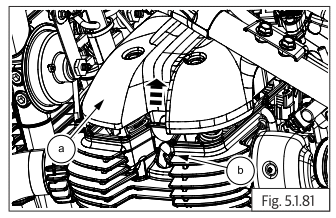
- Gently remove rocker cover (a) from cylinder head (b).
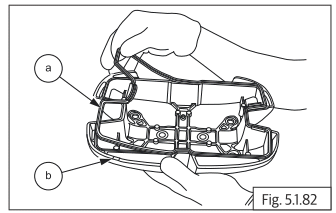
- Remove rubber gasket (a) from rocker cover (b).
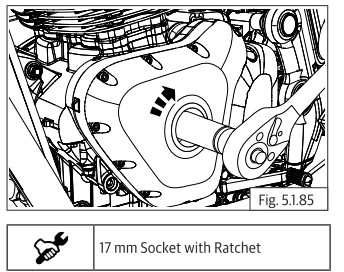
Crankshaft Plug On Magneto Cover
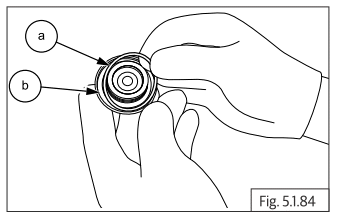
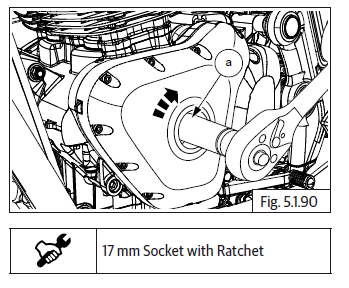
- Remove crankshaft hole plug (M34) (a) from center of magneto cover (b).
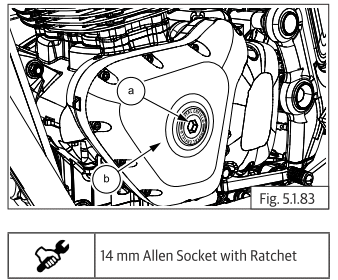
- Remove O-ring (a) from crankshaft hole plug (b).
Rocker Carrier LH from Cylinder Head
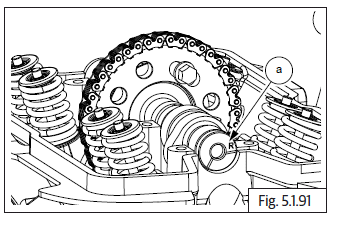
- Rotate the magneto rotor in clockwise direction and ensure reference mark "L" mark in camshaft is aligned with cylinder head on the LH side.
- Loosen and remove 4 Nos. Hex flange head bolts (M6) (a) from rocker carrier LH.
- Gently remove the rocker carrier LH (a) along with rocker arms from cylinder head.
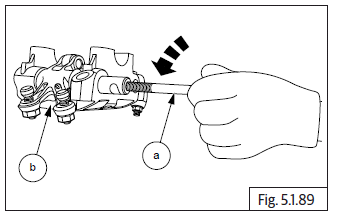
- Thread in a suitable Hex flange bolt (M6) (a) into the rocker shaft and gently pull out the rocker shaft from rocker carrier LH (b).
- Remove the rocker arms from carrier LH.
Rocker Carrier RH from Cylinder Head
- Rotate magneto rotor (a) in clockwise direction and ensure reference mark "R" in camshaft (a) is aligned with cylinder head on the LH side.
- Loosen and remove 4 Nos. Hex head bolts (M6) (a) from rocker carrier RH and remove carrier along with rocker arms from cylinder head.

- Thread in a suitable Hex flange bolt (M6) (a) into the rocker shaft and gently pull out the rocker shaft from rocker carrier RH (b).
- Remove the rocker arms from carrier RH.
See also:
 Royal Enfield Interceptor 650 - Service manual > Gear Shifter Shaft
Remove the circlip (a) from shifter shaft (b) on engine LH side. Remove the washer (a) from shifter shaft. Gently pull out shifter shaft assembly (a) from engine RH side. Remove circlip (a) from shorter end of shifter shaft (b). Remove washer (a) from shorter end of shifter shaft (b). Remove spring (a) from shifter shaft (b). Remove plate (a) from shorter end of shifter shaft (b). Remove circlip (a) from longer end of shifter shaft (b). Remove washer (a) from longer end of shifter shaft (b). Expand spring lugs and pull out spring (a) from longer end of shifter shaft (b).
Royal Enfield Interceptor 650 - Service manual > Auto Chain Tensioner
Loosen and remove Hex flange head bolt (M6) (a) from the auto chain tensioner. Insert a small screw driver into chain tensioner and loosen until timing chain slack is at the maximum. Loosen and remove 2 Nos. Hex flange head bolts (M6) (a) to remove auto chain tensioner from cylinder barrel (b). Remove auto timing chain tensioner (a) from cylinder barrel along with gasket.
 Rider's Manual BMW R 1250 GS GSA
 Owner's Manual Harley-Davidson Sportster XL1200X Forty-Eight
 Owner's Manual Honda CBR650R
 Service manual Honda CBR650
 Owner's Manual Honda PCX125
 Owner's Manual Kawasaki Z1000SX
 Service manual Kawasaki Z1000SX
 Owner's Manual Lexmoto Echo
 Owner's Manual Royal Enfield Interceptor 650
 Service manual Royal Enfield Interceptor 650
 Owner's Manual Yamaha MT-07