 Honda CBR650 - Service manual > Starter clutch
REMOVAL
Remove the clutch.
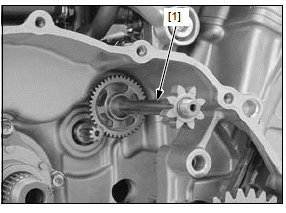
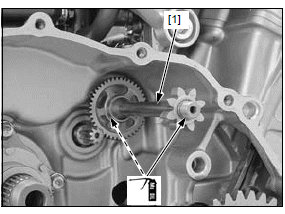
Remove the starter reduction gear [1] from the crankcase.
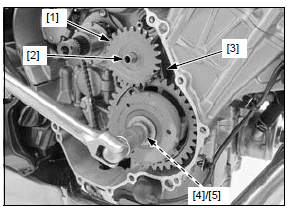
Temporarily install the following:
- Starter idle gear [1]
- Starter idle gear shaft [2]
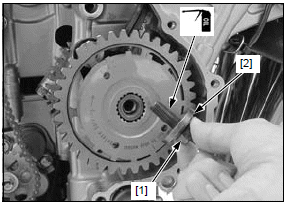
Insert the gear holder [3] between the starter idle gear and driven gear as shown.
TOOL:
[3] Gear holder, M2.5 07724-0010100
Remove the starter clutch mounting bolt [4] and washer [5].
Remove the temporarily installed parts.
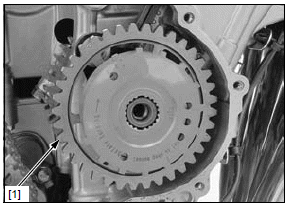
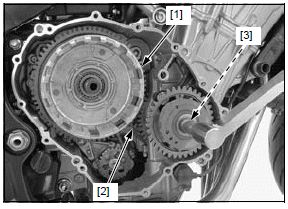
Remove the starter clutch outer assembly [1].
Remove the thrust washer [1].

DISASSEMBLY
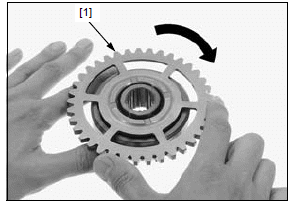
Check the operation of the one-way clutch by turning the driven gear [1].
You should be able to turn the driven gear clockwise smoothly, but the gear should not turn counterclockwise.
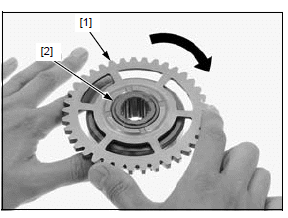
Remove the starter driven gear by turning it clockwise.
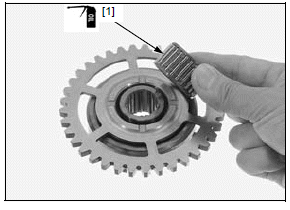
Remove the needle bearing [2].
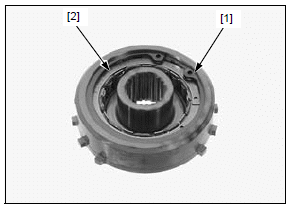
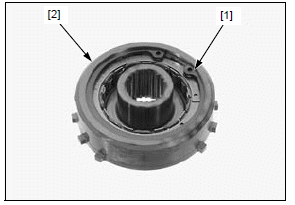
Remove the snap ring [1] and one-way clutch [2].
INSPECTION
Inspect the following parts for scratch, damage, abnormal wear and deformation.
- Starter driven gear
- Starter reduction gear
- Starter clutch outer
- Starter one-way clutch
Measure each part according to CLUTCH/GEARSHIFT LINKAGE/STARTER CLUTCH SPECIFICATIONS.
Replace any part if it is out of service limit.
ASSEMBLY
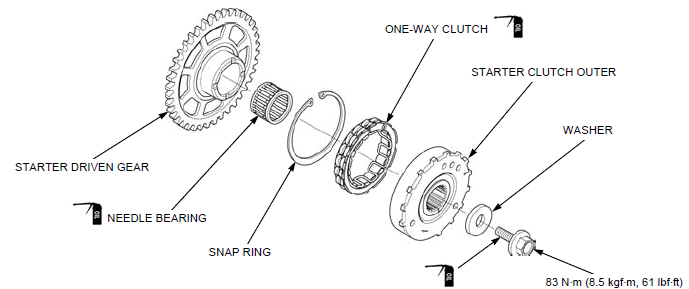
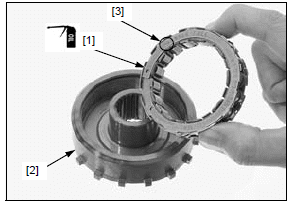
Apply engine oil to the one-way clutch [1] contacting surface.
Install the one-way clutch into the starter clutch outer [2] with its arrow mark [3] facing out.
Install the snap ring [1] into the starter clutch outer [2] groove securely.
Install the starter driven gear [1] into the starter clutch outer while turning the starter driven gear clockwise.
Apply engine oil to the rotating area of the needle bearing [1].
Install the needle bearing into the starter clutch outer.
Recheck the one-way clutch operation.
INSTALLATION
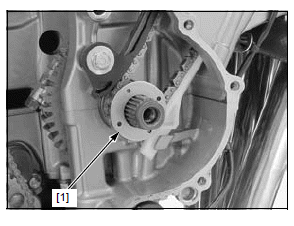
Install the thrust washer [1] to the crankshaft.
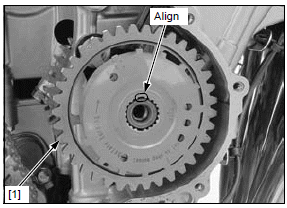
Install the starter clutch outer assembly [1] to the crankshaft while aligning the tab of the crankshaft with the wide groove of the starter clutch outer assembly.
Apply engine oil to the starter clutch outer mounting bolt [1] threads and seating surface.
Install the washer [2] and starter clutch mounting bolt.
Temporarily install the following:
- Oil pump drive sprocket guide
- Oil pump drive sprocket
- Clutch outer guide
- Clutch outer [1]
- Clutch outer needle bearing
Be careful not to drop the gear holder into the crankcase.
Attach the gear holder [2] between the primary drive gear and driven gear.
TOOL:
[2] Gear holder, M2.5 07724-0010100
Tighten the starter clutch outer mounting bolt [3] to the specified torque.
TORQUE:83 N*m (8.5 kgf*m, 61 lbf*ft)
Remove the temporarily installed parts.
Apply molybdenum oil solution to the starter reduction gear [1] sliding surface.
Install the starter reduction gear into the crankcase.
Install the clutch.
See also:
 Honda CBR650 - Service manual > Clutch
REMOVAL Remove the right crankcase cover. Remove the thrust washer [1] and wave washer [2] from the starter idle gear.
Honda CBR650 - Service manual > Gearshift linkage
REMOVAL Remove the clutch. Remove the pinch bolt [1] and disconnect the gearshift arm [2] from the gearshift spindle.
 Rider's Manual BMW R 1250 GS GSA
 Owner's Manual Harley-Davidson Sportster XL1200X Forty-Eight
 Owner's Manual Honda CBR650R
 Service manual Honda CBR650
 Owner's Manual Honda PCX125
 Owner's Manual Kawasaki Z1000SX
 Service manual Kawasaki Z1000SX
 Owner's Manual Lexmoto Echo
 Owner's Manual Royal Enfield Interceptor 650
 Service manual Royal Enfield Interceptor 650
 Owner's Manual Yamaha MT-07