 Kawasaki Z1000SX - Service manual > Water Pump
Water Pump Removal
- Drain:
Coolant (see Coolant Change in the Periodic Maintenance chapter)
Engine Oil (see Engine Oil Change in the Periodic Maintenance chapter) - Remove:
Left Lower Fairing (see Lower Fairing Removal in the Frame chapter)
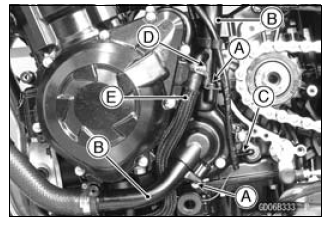
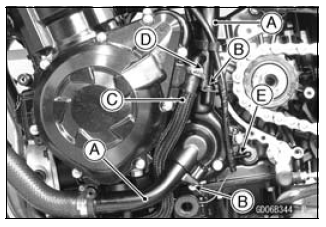
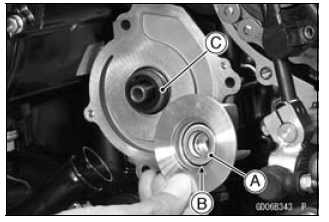
Engine Sprocket Cover (see Engine Sprocket Cover Removal in the Final Drive chapter) - Remove the water pipe bolts [A] to pull out the water pipes [B] from the water pump cover.
- Disconnect the neutral switch connector [C].
- Loosen the clamp bolt [D] to remove the water hose [E].
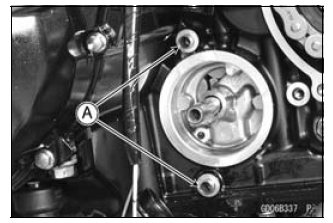
- Remove:
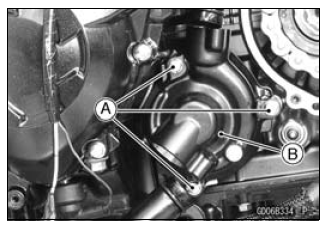
Water Pump Cover Bolts [A]
Water Pump Cover [B]
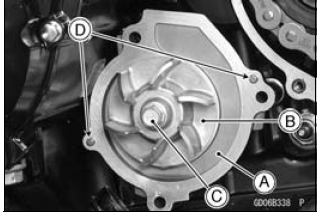
- Remove:
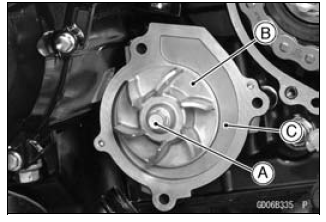
Water Pump Impeller Bolt [A] and Washer
Water Pump Impeller [B]
Water Pump Housing [C]
Water Pump Installation
- Replace the O-ring [A] with a new one, and install it.
- Be sure to install the dowel pins [A].
- Install:
Water Pump Housing [A]
Water Pump Impeller [B] - Tighten:
Torque - Water Pump Impeller Bolt [C]: 9.8 N*m (1.0 kgf*m, 87 in*lb) - Be sure to install the dowel pins [D].
- Replace the O-ring [A] with a new one, and install it.
- Install the water pump cover [A].
- Tighten:
Torque - Water Pump Cover Bolts [B]: 11 N*m (1.1 kgf*m, 97 in*lb) - Replace the O-ring [C] with new ones.
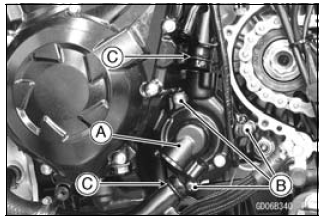
- Install the water pipes [A] to the water pump cover.
- Apply a non-parmanent locking agent to the threads of the water pipe
bolts [B], and tighten them.
Torque - Water Pipe Bolts: 12 N*m (1.2 kgf*m, 106 in*lb)
- Install the water hose [C].
- Tighten:
Torque - Water Hose Clamp Screw [D]: 2.9 N*m (0.30 kgf*m, 26 in*lb) - Connect the neutral switch connector [E].
Water Pump Inspection
- Remove the left lower fairing (see Lower Fairing Removal in the Frame chapter).
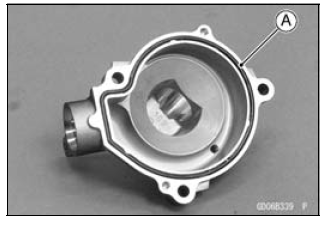
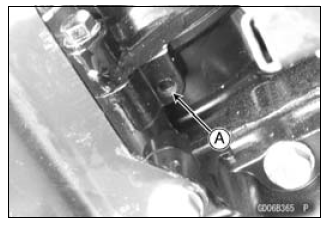
- Check the drainage outlet passage [A] at the bottom of the water pump
body for coolant leaks.
If the mechanical seal is damaged, the coolant leaks through the seal and drains through the passage. Replace the mechanical seal un
Water Pump Impeller Disassembly/Assembly
- Remove the water pump impeller (see Water Pump Removal).
- The sealing seat and rubber seal may be removed easily by hand.
- Apply coolant around the surfaces of the rubber seal and sealing seat.
- Install the rubber seal [A] and sealing seat [B] into the impeller by pressing them by hand until the seat stops at the bottom of the hole.
- Install the water pump impeller (see Water Pump Installation).
Water Pump Impeller Inspection
- Remove the water pump cover (see Water Pump Removal).
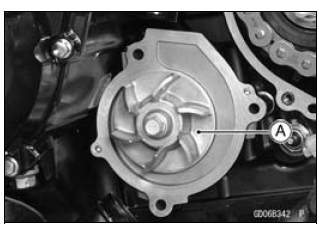
- Visually inspect the water pump impeller [A].
If the surface is corroded or if the blades are damaged, replace the impeller.
Water Pump Housing Disassembly
NOTICE Do not damage the hole wall of the water pump housing.
- Insert a bar [A] into the pump housing [B], and hammer evenly around the circumference of the mechanical seal bottom [C].
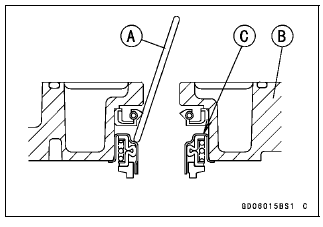
- Take the oil seal [A] out of the housing [B] with a hook [C].
Water Pump Housing Assembly
NOTICE Do not reuse the mechanical seal and oil seal.
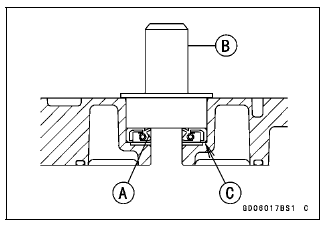
- Apply high-temperature grease to the oil seal lips [A].
- Press the new oil seal into the housing with a bearing driver [B] until
it stops at the bottom surface [C] of the housing.
Special Tool - Bearing Driver Set: 57001-1129
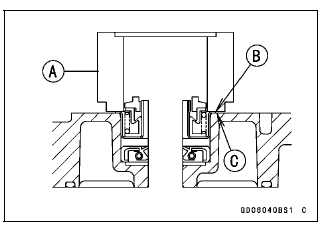
NOTICE Be careful not to damage the sealing surface of the mechanical seal.
- Press the new mechanical seal into the housing with the oil seal driver
[A] until its flange [B] touches the surface [C] of the housing.
Special Tool - Oil Seal Driver: 57001-1660
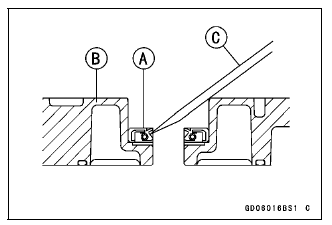
Mechanical Seal Inspection
- Remove the water pump impeller (see Water Pump Removal).
- Visually inspect the mechanical seal.
If any one of the parts is damaged, replace the mechanical seal as a unit.
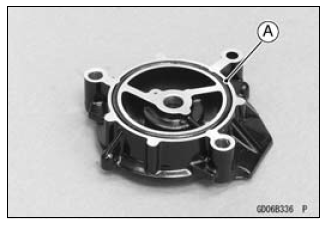
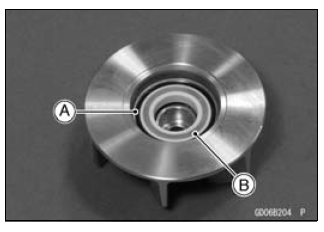
Impeller Sealing Seat Surface [A]
Rubber Seal [B]
Mechanical Seal [C]
See also:
 Kawasaki Z1000SX - Service manual > Coolant
Coolant Deterioration Inspection Remove the right lower fairing (see Lower Fairing Removal in the Frame chapter). Visually inspect the coolant [A] in the reserve tank.
Kawasaki Z1000SX - Service manual > Radiator
Radiator and Radiator Fan Removal Remove: Lower Fairing (see Lower Fairing Removal in the Frame chapter) Coolant (Drain, see Coolant Change in the Periodic Maintenance chapter) Remove: Radiator Hose Clamp [A] Radiator Cap Mounting Bolt [B] Radiator Hose [C] Remove: Radiator Upper Bolt [A] Move the radiator right ward [A] to clear the frame projection [B]. Remove: Rubber Band [A] Slide the connector cover [A] to disconnect the radiator fan motor lead connector [B]. Remove: Radiator Hose Clamp Screw [A] (Loosen) Radiator Hose [B] Radiator Lower Bolt [C]
 Rider's Manual BMW R 1250 GS GSA
 Owner's Manual Harley-Davidson Sportster XL1200X Forty-Eight
 Owner's Manual Honda CBR650R
 Service manual Honda CBR650
 Owner's Manual Honda PCX125
 Owner's Manual Kawasaki Z1000SX
 Service manual Kawasaki Z1000SX
 Owner's Manual Lexmoto Echo
 Owner's Manual Royal Enfield Interceptor 650
 Service manual Royal Enfield Interceptor 650
 Owner's Manual Yamaha MT-07